Epoxy flooring energizes, protects, and upgrades concrete flooring systems in basements, patios, garages, and showrooms. When installed in multiple layers, epoxy coatings create seamless stretches of flooring that can resist scuffing, scratches, grease, staining, moisture, and chemicals. “Epoxy floor Paint is also easy to maintain, economical, slip-resistant, and durable. It adds a high-quality appearance but also ensures safety. ” Epoxy flooring is blended from two separate components before installation to adhere to concrete firmly; hence it is less likely to chip or peel like traditional floor paints.
In this article, we will guide you on how to install epoxy coating for your concrete floors.
Choosing the right epoxy

Epoxy floor paints are durable resin paints that usually consist of two parts combined before application. There are three different epoxy paint types to choose from:
- Solid epoxy is the most basic type of epoxy paint. Solid epoxy is expensive and challenging to install as it hardens very rapidly.
- Solvent-based epoxy is up to 60 percent solid, which enables it to penetrate and adhere to concrete flooring easily. They come in a variety of colors.
- Water-based epoxy contains up to 60 percent solid. Unlike solvent-based epoxies that contain harsh chemicals, water-based epoxies don’t contain hazardous fumes.
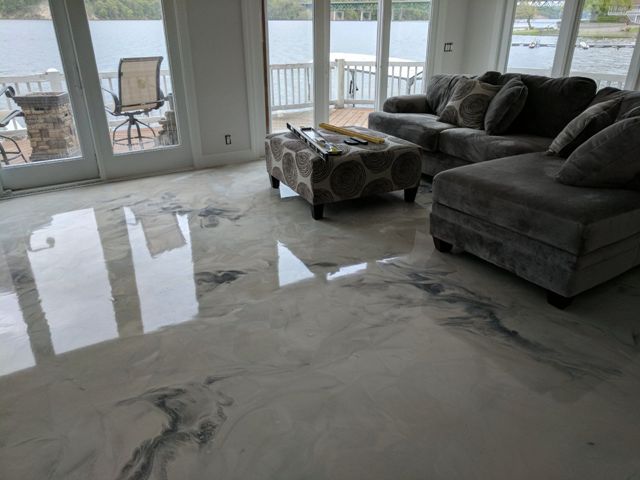
- Pre-tinted and metallic epoxy coatings are usually for decorating purposes as they come in a wide range of shades and styles. There are also those with flakes and speckled patterns that reflect light making them excellent flooring systems for showrooms and select commercial spaces.
Here is a step-by-step guide on how to install epoxy floor coatings without the help of a professional:
Here are the things you need:
- 32 percent muriatic acid
- 9-inch medium-nap roller and roller pole
- Cleaning/degreasing solution
- Drill with stirring bit
- Duct tape
- Flat-edge shovel or scraper
- Garden hose
- Paintbrushes
- Plastic bag
- Plastic sprinkler can
- Power scrubber with brush attachment or long-handled acid brush
- Respirator
- Rubber gloves
- Rubber squeegee
- Shop vacuum
- Stiff-bristle brush
- Two-part epoxy paint
Steps:
1. Clean the concrete surface
To remove hardened debris, use a flat-edge shovel or scraper for the best results. Vacuum the floor once clean and dry. Apply the prepared degreasing or cleaning solution with a stiff-bristle brush to remove grease and stains.
2. Wet the flooring
Wet the entire floor with a hose and then power scrub with a brush attachment and degreases to clean the floor deeply. Scrub corners and other hard-to-reach areas with a stiff-bristle brush. Use a squeegee to pull soapy water into the middle portion of the floor. Remove all water and moisture with a wet-dry vacuum.
3. Prepare acid-etching mixture
Pour one gallon of water into a sprinkler can. Make sure to don a vapor respirator before pouring 12 ounces of muriatic acid into 15 cups of water in the sprinkler can. Mix the solution for a few seconds and then sprinkle it evenly over the surface.
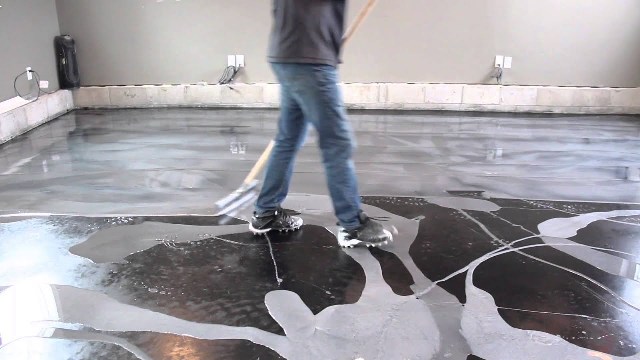
4. Scrub and etch
Power scrub the surface for ten minutes. You may also use a long-handled acid brush to save on equipment rental. Repeat the scrubbing and etching process until the entire floor space is completely etched. Rinse the floor three times to remove all acid residue. Let it dry overnight.
5. Mix epoxy coating
Follow the manufacturer’s instructions when mixing the two-part epoxy paint. Use a drill and stirring bit to mix the epoxy coating solution. For even and complete blending, pour the epoxy paint into a second container and power mix the solution again.
6. Install along the perimeter
Tape the area beneath the entrance and exit doors with duct tape. Brush a 4-inch strip of epoxy paint against the tape and along the walls.
7. Roll on epoxy paint
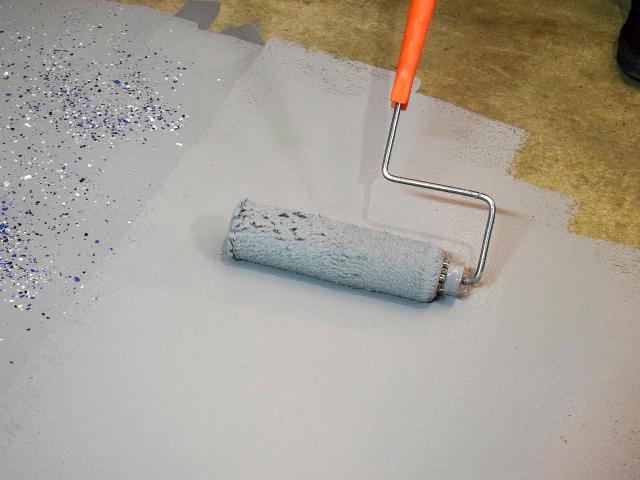
Use a paint roller with a medium nap to paint the flooring. Dip the roller into the epoxy bucket, but make sure only half of the roller is covered with paint. This technique ensures the right amount of epoxy is loaded into the roller.
Apply paint on the floor in a W pattern. Use the backroll technique to fill in the pattern and remove roller marks. Ensure that the edges remain wet as you move along from one section to the next. This technique will prevent noticeable seams from developing once the paint completely dries. Let the first coat of epoxy paint dry as per manufacturer’s recommendations.
8. Apply the second coat
If you don’t want a glossy floor, which tends to be slippery when wet, apply a non-skid floor coating into the epoxy before you start installing the second epoxy paint coat. Stir the non-skid floor coating well before the second coat application. Repeat #7 and let it dry.
If you want to add colored flakes or glitter, make sure to scatter them lightly while the area is wet.
9. Finish the epoxy flooring installation
Paint the bottom 4 inches of the wall with the epoxy paint that you used on the floor. This will create a seamless look and function as a protective baseboard, too.
Make sure to follow the necessary safety precautions when painting your concrete floor with epoxy floor coatings. It is also imperative to follow the manufacturer’s instructions when mixing paints to achieve your desired epoxy flooring finish.