With spring only being just around the corner, why not go grab the trusty tool box? As the days get longer and the weather warms up there’s simply no better time to take on a new DIY project. One amazing project that you should definitely take on this year is an outdoor fireplace. What’s there not to love about your own personal fire which simply gives you outdoor living space life late into the summer’s evening. Perfect for spending time with the family, enjoying some drinks with friends or simply just relaxing after a long day.
This ultimate outdoor fireplace guide will take you through all the need to know facts, enquimpting you for the project ahead.
What Is An Outdoor Fireplace, And Why Does it Matter?
Have you ever imagined what it would be like to have your own secluded fire crackling away on a warm summer’s evening? Well if so, an outdoor fireplace is exactly what you’re looking for. you can find great discounts and deals on a big selection of outdoor fireplaces and grills on wethrift.com.
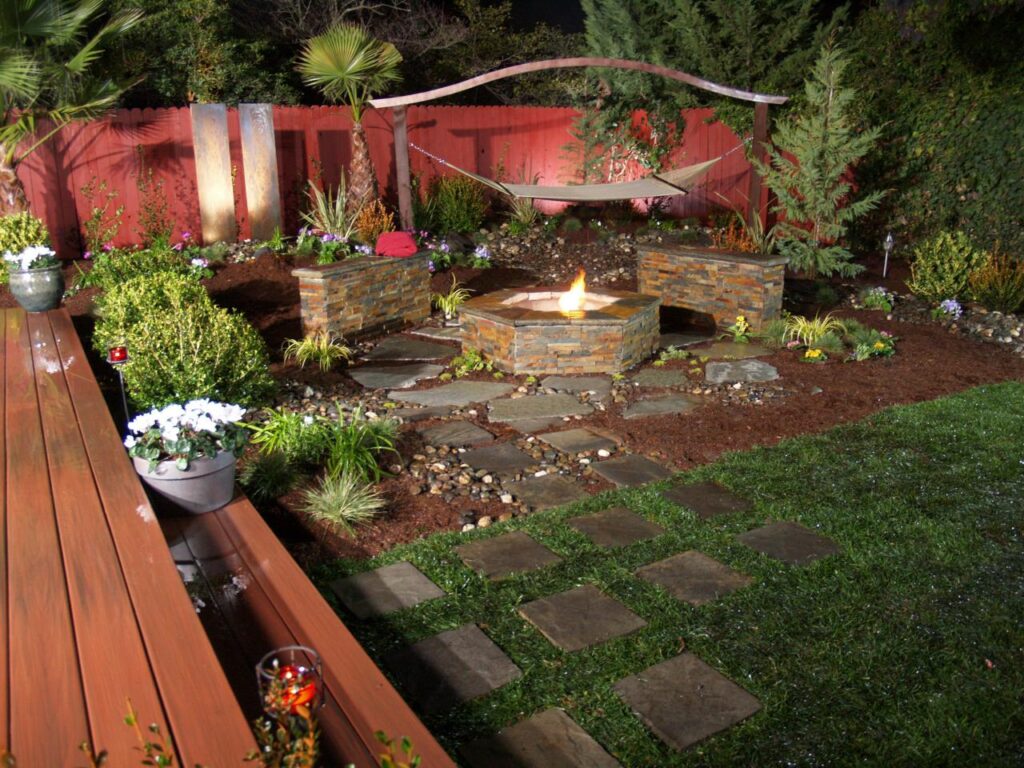
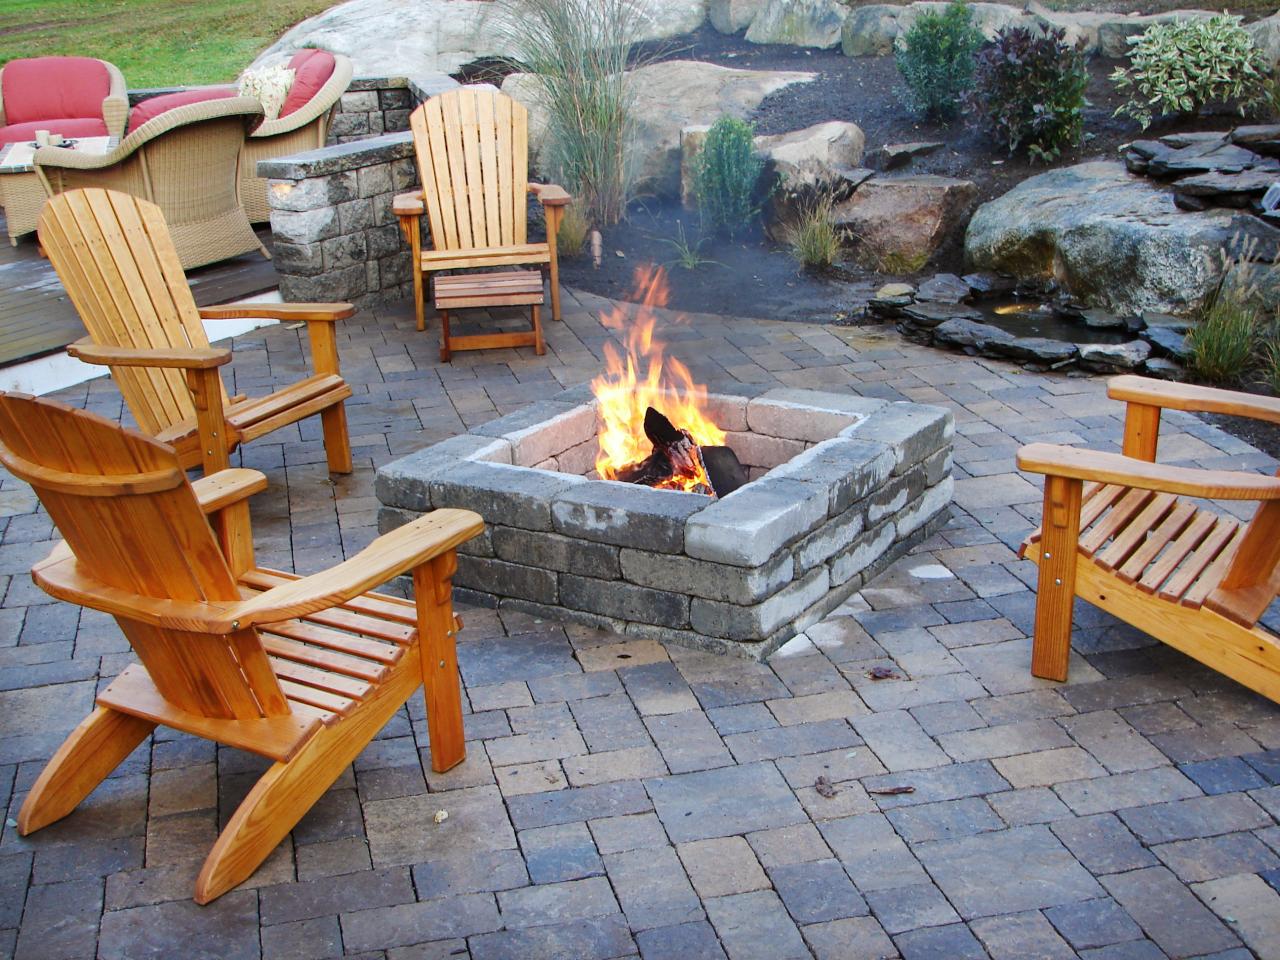
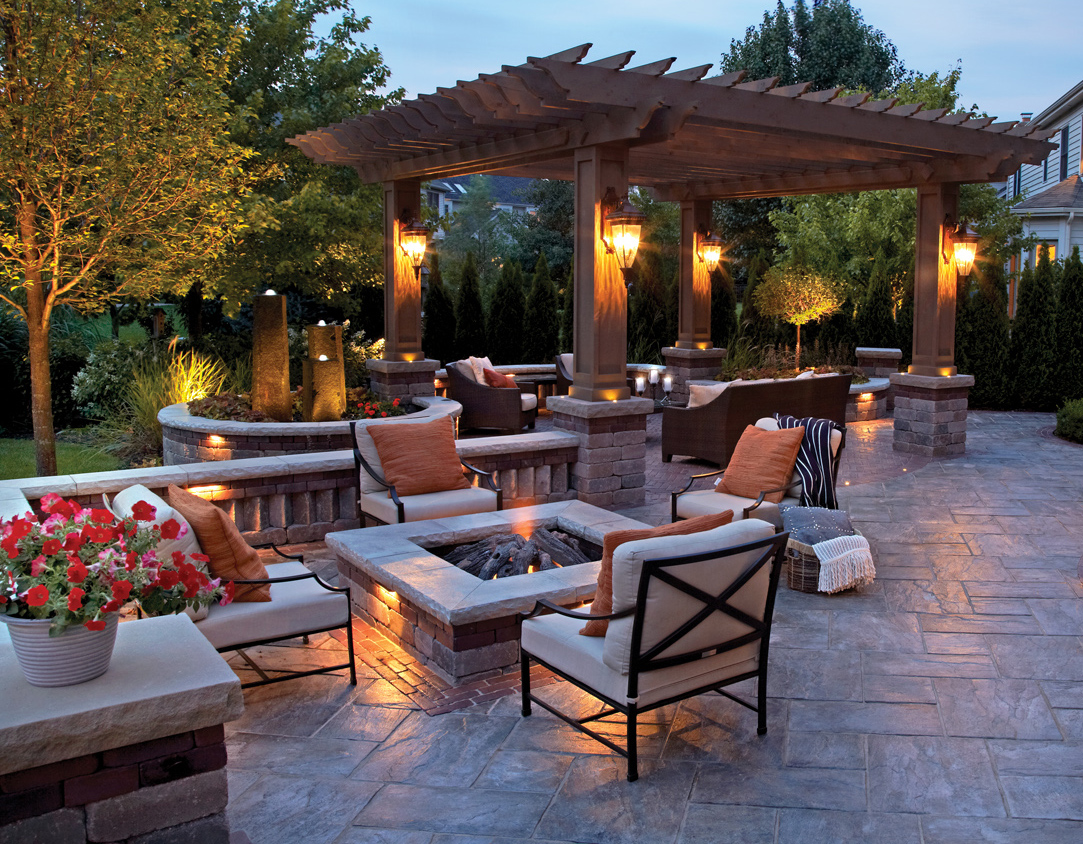
A fireplace that operates within your garden is the best solution for staying warm when the sunlight disappears over the horizon. Our outdoor fireplace guide will create a discreet stone structure which offers you a safe location for burning firewood. Not only will an outdoor fireplace keep you warm in the evenings, but it will offer you the subtle ambient light to keep the conversations flowing late into the evening.
Say goodbye to overwhelming LEDs and welcome your beautiful new fireplace which is hand crafted to meet your specific needs and requirements.
How to construct your own outdoor fireplace
We have kept the steps nice and simple to follow making it simple for you to follow along.
#1 Purchasing The Required Materials
The first step in creating yourself a personal outdoor fireplace is by heading down to your local building merchant. There you will be able to find all of the following resources for the project.
Required Materials:
- 1x Cap Stone
- 4x Adhesive Glue
- 20x Fire Brick
- 4x Lintel
- 5x Trimstone
Required Tools:
- Hammer
- Caulk Gun
- 4 Foot Leveler
- 2X Ladders
- Safety Goggles
- Cleaning Brush
#2 Laying Your Foundations
So let’s get started with the construction of the fireplace! First we need to lay the first layer which is the foundation. Find yourself a nice flat area of ground where you can place the first blocks of stone. Create yourself a large square shape out of stone which is even. Measuring all sides of the square is the best way to achieve a symmetric finish.
- Pro Tip: Make sure you regularly check that the stones are level *
#3 Building Up The Walls
Now we need to start building up the walls of the fireplace. Place the bricks around the perimeter of the square leaving a large opening at the front. Prior to laying the block, apply a thin coat of adhesive to the block below to add an extra layer of security. Something to take into consideration, keep the adhesive glue used to a minimum. Gravity will be what holds this fireplace together, not the overuse of adhesive. Keep the front facing side of the base free of walls. This will become the opening.
- Pro Tip: Stop once you have laid your first layer of stone! *
#4 Applying the Firebrick
Now we have laid the first layer of stones to the base we need to create an internal layer of firebrick. Take the firebricks and apply them flush to the exterior wall. This will help create a safety layer between the naked flame and the blocks of stone that we have been using on the outside. From now on we are repeating this process until you are happy with the height of the front opening.
- Pro Tip: Keep the front opening a meter high to give you room for plenty of wood *
#5 Installing The Angle Block
The angle blocks will be used to create a roof to the front opening, this will ensure we have a snug fireplace opening which we can then pack full with firewood. Take the front two pillars we created either side of the opening and place the angled blocks to create a slight ledge facing into the opening. Use some wet sand to level these two ledges out and make flush.
#6 Rise and repeat
From now on we are treating the process of laying the stone blocks over and over to create a chimney. All sides of the fireplace will be created now and we will have a secure front opening for loading the fireplace with wood. Once you have built the firepit up by a meter or two we need to start narrowing the chimney off. To do this we need to lay the blocks two inches in and continue the process. Once the chimney is a suitable height finish it off with an even layer of stone blocks. Leave to set overnight and then when you wake up it will be ready to use.
- Pro Tip: Don’t forget to use your firebrick to ensure the firepit is secure. *
Well there you go! You have now constructed your very own outdoor fireplace. Now you can kick back, grab yourself a nice cool beverage and relax all evening long while the fire crackles away.
Once you have experienced the tranquil environment created by a traditional wood burning fireplace you can never go back. When the winter finally passes by it can leave you missing the time spent sitting around the fire. Luckily, you can find yourself a brand new fireplace in harrogate at an affordable price. Allowing you to enjoy this gentil atmosphere created by a real fire regardless of the weather outside.