Hardwood flooring can add warmth and style to your home while increasing its resale value. The best part is that you can install hardwood floors without the help of professionals. However, you can choose a proper installation method and follow some safety measures to make the installation achievable. Since it is your first project, get the materials and tools and know the usage. Adequate preparation is a must to make the process safe and hassle-free.
What Safety Gears Will You Need?
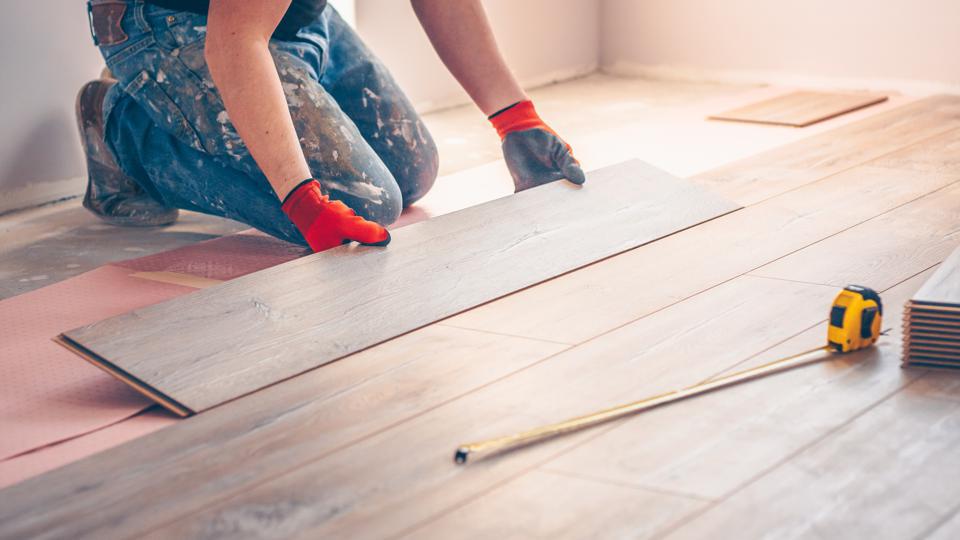
You can protect your eyes, hands, face, knees, and ears to stay safe when installing hardwood floors. Once you have safety tools, you can give all your attention to your project instead of bothering about your safety. You can wear a safety mask, safety glasses, and gloves while using a saw. Besides, you can wear ear protection, knee pads, and steel-toed boots.
Tools and Materials for Installing Hardwood Floors
You will need different tools to install hardwood floors. Your installation method will decide the devices for your project. You might need tape, war plugs, a pry bar, a moisture meter, work gloves, hammer, drill and bits, chalk, knee pads, a mallet, a safety mask, a safety glass, staple gun, nail setters and punches, and a few others.
Besides, you might need hardwood, underlayment, nails, wood putty, vapour barrier paper, adhesive, and collated flooring nails. First, collect the tools and materials, and then consider the following steps to install your hardwood flooring.
How to Install Hardwood Floors
Choose the Right Method
You can install hardwood floors with three methods, but each will have specific requirements. You can consider the glue-down, nail-down, or click-lock install method. The glue-down is a popular installation option since it will not require additional skills and attention. You can secure the floors with glue.
The click-lock method is different and requires clicking and attaching the panels to block out moisture. You can consider this installation when the subfloor is tile or cement. The last one is nail-down and can be perfect for a lasting solution. But it will require more effort and time. You can only consider this when you have a wooden subfloor. Since the nail-down method is unachievable without a wooden subfloor, you might need to spend more on this installation.
You might find the glue-down method the easiest among all these installations. We will cover step-by-step instructions for the glue-down installation. Keep reading if you want to install wood flooring without any expertise.

Glue Down Method
Glue down method will be an excellent choice for the concrete floor since it will not require an extra vapour barrier. Also, you can consider this installation when you have a limited budget. Here are step-by-step instructions for your help.
Step One: Spread Adhesive
First, you should prepare your floor and subfloor before planning the next step. After the preparation, you can use a towel to spread flooring adhesive. Spread enough glue on a few rows and then start working. The glue will dry up within sixty minutes, and you cannot place it on more areas than you can cover. While placing adhesive, hold the towel at a forty-five-degree angle and layout it in small sections.
Step Two: Start Installing
You can start from the first row from the starting line and use a table saw to cut the last board while leaving inches gap. After covering the first row, add the second row, and then fit the grove onto the tongue of the first row and tap it gently using a rubber mallet. You can use spacers to maintain the required expansion gap. Use the rubber mallet to tap rows and ensure that rows flush against each other. When using engineered hard flooring, you can match the ends. You might need to cut the width in the last row to ensure a perfect fit. Before cutting, measure the space and subtract � inch to maintain the expansion gap.
Step Three: Cut the Boards & Install Transition Strips
Cut the boards and put them in the right place. Install the baseboards and then use shoe moulding to cover the expansion gap. Finally, install the transition strips on the exposed edges of the floor.
With these simple steps, you can install hardwood flooring and add style to your home. First, collect safety gear and all the tools and materials and then start the project and achieve perfection.