There are several things to know when it comes to replacing your hardwood floors. Check out this guide on how to replace wood floors.
Most wooden floors begin to show signs of aging after about 20 years. You start to see dullness, scratches, and discoloring. One of the options you have is to replace the floor altogether.
So how do you go about replacing wood floors? The good news is that the process is a straightforward one. In this comprehensive guide, we show you how to replace wood floors in your home.
Read on to learn more.
Part 1 of How to Replace Wood Floors: Remove the Old Wood
Getting this step right is crucial to the success of the floor replacement project. Here’s how to go about it:
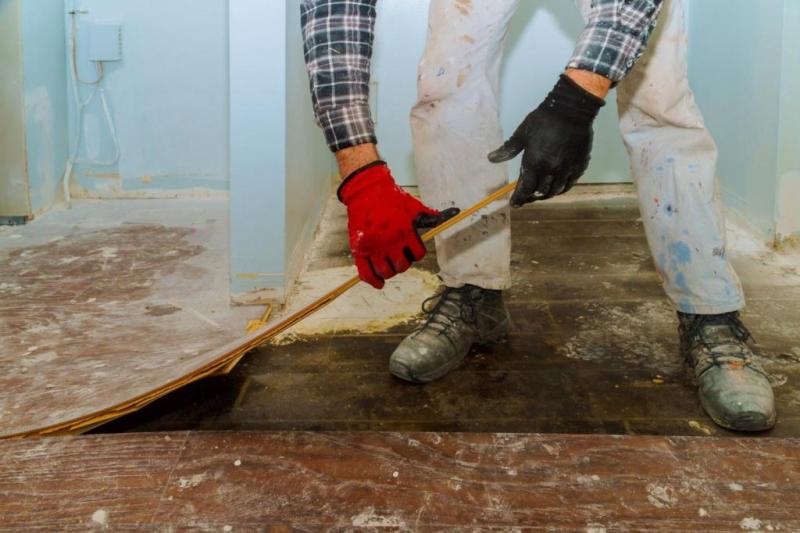
Wear the Right Gear
As you probably already know, there are several hazards in hardwood floor installation and replacement. Keep in mind that you’ll be working hard on your knees and using your hands, so you need to have protective gear.
Find a good pair of knee pads to keep your knees safe. Invest in sturdy gloves and protective glasses as well. Gloves will prevent splinters from hurting your hands, while goggles will keep your eyes safe from sawdust and other debris.
Measure the Thickness of the Old Wood Floor Before Sawing
You’ll need to saw into the floor to remove your current old floor. To make sure that you don’t damage the subflooring underneath, pry up one of the loose boards in your old floor and measure its thickness before you begin sawing.
Most wooden floors have a thickness of 0.5 inches to 1 inch. As soon as you confirm the thickness of the current flooring, set your circular blade to the same depth.
Using the circular saw, make single cuts that are perpendicular to the direction the floor lays. Start from one end of the room to the other one, and make sure that your hands are out of the circular saw’s blade.
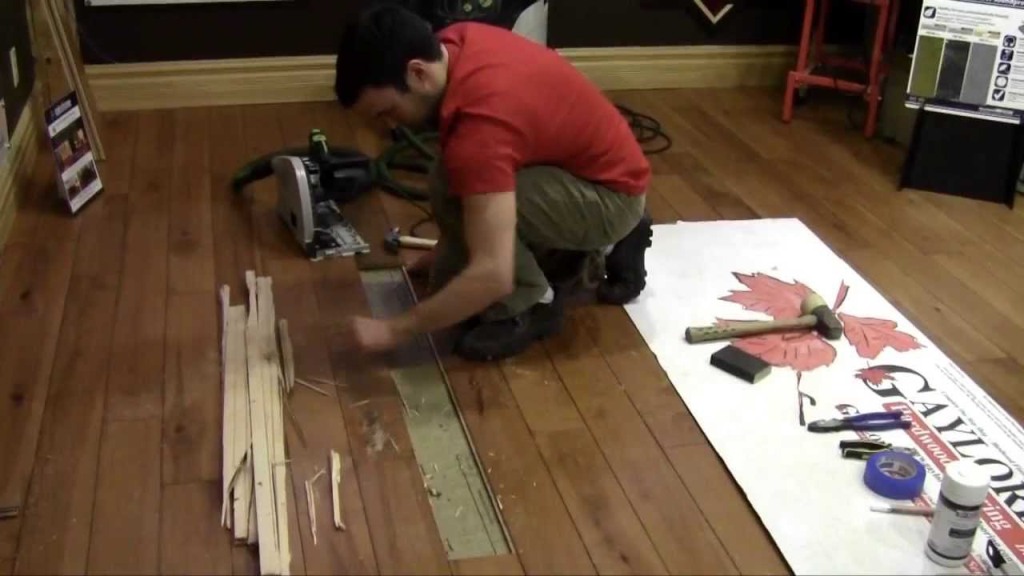
Remove the Planks
Using a mallet and a pry bar, remove the first wooden plank. You can start anywhere in the room. Ensure you have a discard pile for the planks you remove.
As soon as you’ve pried out the first plank, removing the rest of the planks should be a reasonably easy job. You’ll find that most of the remaining planks come out easily. As long as you’re wearing gloves, you can even pull the pieces out with your hands.
Part 2: Prepare the Subflooring
Now that you’re through removing the old floor, it’s time to get the subflooring ready for the new wood. Here’s how to go about it:
Remove Nails and Staples
Using a nail claw and curved vice grips, pull out all the nails and staples lodged into the subflooring. Don’t leave any of them behind as it’s crucial to begin on a clean slate. Use a large magnet to pick up the nails and staples from the subflooring.
Sand Off Paint or Adhesive From the Floor
What kind of floor replace option are you considering? That should help you know how pristine your floor should be.
If you intend to use glue with your new hardwood floor, then you’ll need to sand away any adhesive or paint that’s stuck to the subfloor using an electric sander. If, on the other hand, you’re thinking of a locking, floating, or nail-down wooden floor, then there’s no need for sanding.
Ensure the Subfloor Is Flat
Use a straight piece of wood to check the flatness of the subfloor. Just lay it down and look for any raised bumps or dips beneath the plank. Move the piece of lumber across and turn it diagonally the floor.
If you find any problem spots on the floor, eliminate them to make sure that the subfloor is as flat as possible.
Vacuum the Subfloor
Suck up all the sawdust and other debris using a shop vac. Don’t forget to clean up any metal debris before using the shop vac as metal can damage the vacuum.
Part 3: Install the Replacement Flooring
In this section of how to replace hardwood flooring, we discuss how to install your new wood flooring. Here are the steps to follow:
Choose the Replacement Wood Flooring
Wood flooring comes in a variety of options. You may opt to go with the same flooring type as your old floor or go with a different option. To see the numerous varieties available, you can visit reputable websites like National Floors Direct.
Depending on your preferences, you can opt for locking hardwood or nail-down flooring. You could also choose to glue your new wooden floor into place.
Let the New Wood Acclimate
Once you’ve purchased the flooring of your choice, stack the planks in the room you intend to install them for at least three days. That helps the wood acclimate to its new environment before its installation. The last thing you want is for the wood to shrink or swell after installation, leaving gaps in your flooring.
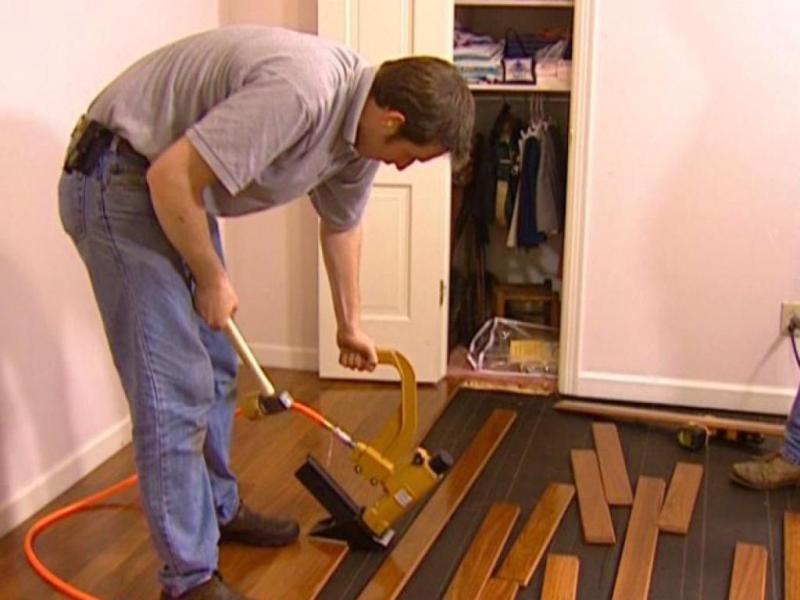
Nail Down or Glue the Flooring
Both engineered wood and solid hardwood can be nailed down if you’re looking for a long-lasting and sturdy option. But if you’re looking for a less time-consuming installation method, you can opt to glue the wood down, particularly if you’re using engineered hardwood. Be sure to follow the adhesive manufacturer’s instructions.
Where you’re using floating hardwood flooring, you don’t need to worry about gluing or nailing it down. The planks of this type of flooring interlock together firmly.
Part 4: Complete the Installation
Once the floor is in place, it’s time to finish up the installation process. Follow these tips to do it successfully:
Clean the Area
Clean and vacuum the floor thoroughly. If there’s any excess glue, wipe it up using a rag. Where there’s sawdust, suck it up using a vacuum.
Store any planks you didn’t use safely or discard them altogether. Put away tools and nails.
Weigh Down the Floor
In case you used glue, you’ll need to cover your flooring with heavy objects like potted plants and books. That’s because glue can expand once it has dried, lifting some of the replacement boards and making them uneven with the others. Remove the heavy objects after 24 hours and enjoy your new, even floor.
Fill In Holes with Wood Filler
This point is for those who used nails. Get a tube or can of wood filler from your local store and apply the filler to any holes you spot on the floor, so it’s as smooth as possible.
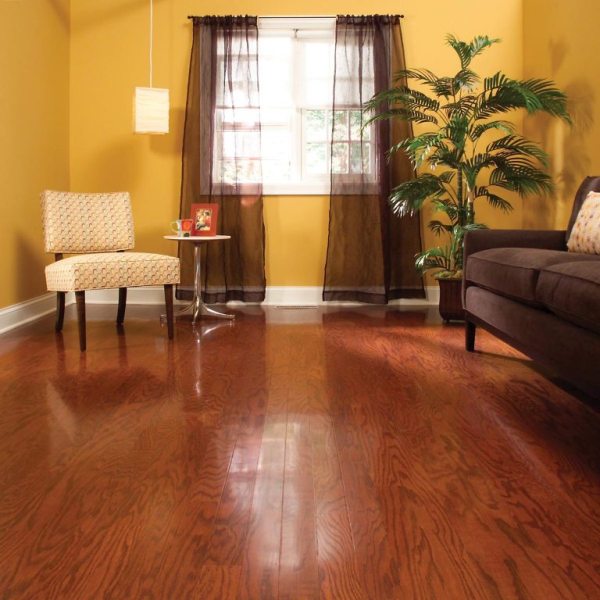
Replace Your Hardwood Floor Today
As you can see, anyone can learn how to replace wood floors if they set their mind on it. It’s a fairly straightforward process, as long as you have the right gear, tools, and replacement flooring.
Would you like to read more great content like this? Keep visiting our website.