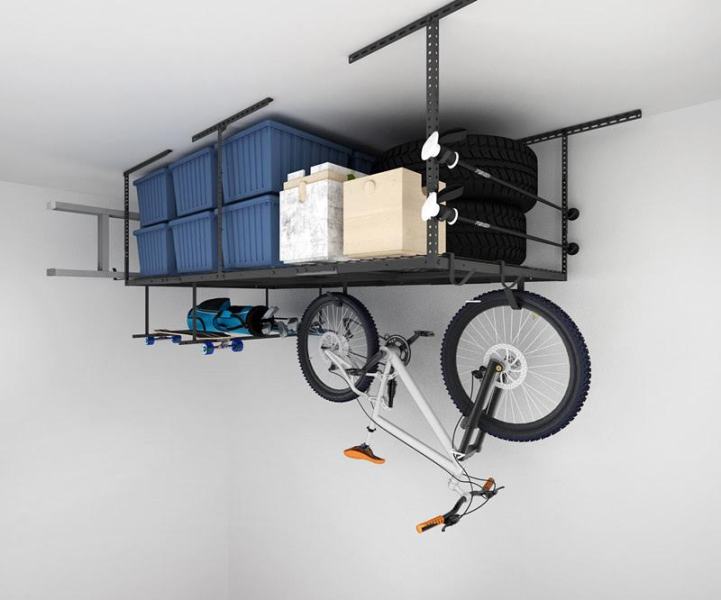
Is your garage full and you are looking for an excellent way to reduce clutter? Then what you need is Fleximount overhead storage. With a properly constructed overhead storage unit, you will be able to keep more items in your garage and also increase the value of your property.
You can find more information on overhead storage installation at Organyzedu.com
Advantages of Fleximount Overhead Storage
Some of the benefits attached to installing an overhead storage solution include:
- Durability: The Fleximount overhead storage is made with strong materials like steel. This helps it to bear the weight of various materials, and last for many years.
- Addons: Fleximount allows for other materials to be attached to the main grid. This includes things like hooks and screws of different sizes. You can hang accessories to these hooks and other extensions if there is no space on the overhead rack.
- Easy Installation: One major advantage of this overhead storage is that its installation is quite easy. Apart from this, you can adjust the racks’ height to fit the length of your garage easily.
What Are The Features Of Fleximount Overhead Storage?

- Down Brackets: These are adjustable brackets attached to your ceiling joists to keep the rack steady. They are compatible with different models of ceiling joists.
- Wire Grids: The wire grid is attached to the down brackets to make a complete overhead storage rack. This makes the Fleximount overhead storage sturdy so that it can hold heavy equipment.
- Screw-Set: the screw set is used to attach the wire grid, down brackets, and connecting posts. Some of them include wrenches, bolts, screws, and nuts.
- Hooks: Although attaching hooks to your overhead storage is not necessary, it can hold extra materials like bike wheels if there is no space in your garage. However, make sure it does not scratch any item on the floor while hanging from the hook.
- Connecting Posts: These vertical posts are attached to the down brackets and are also used to hold the wire grid up.
What Tools Do I Need For Installation?
-
- Power Drill: The power drill is used to drill holes into the ceiling joists before the down brackets are attached. After holes are drilled into the joists, you can use a wrench and bolts to attach the ceiling joists’ brackets.
- Measuring Tape: It is used to achieve accuracy in the placement of the down brackets.
- Ladder: Since overhead storage is attached to the ceiling, you need a ladder to get to the ceiling height. However, you have to be careful to avoid injury.
- Installation Template: The installation template helps you mark points in your ceiling joists for easy drilling of holes.
How Do I Install My Fleximount Overhead Storage?
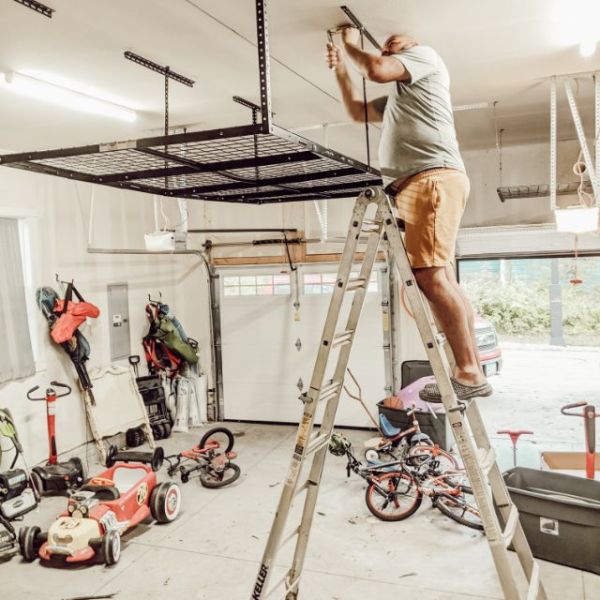
Installing your overhead storage requires patience, caution, and concentration. Not installing the proper way is quite dangerous. You need to remember that it is “overhead”, so a breakaway can lead to serious harm.
Installing the Down Brackets
Before you can start your overhead storage installation, you have to make sure that your ceiling joists are in the right place. Use your installation template as a guide when marking the points you want to attach your own brackets to the joists. Mark holes at the right and left sides of the joists and use chalk to highlight the points you made.
Use your power drill to drill a hole in the center of all the points you made on the joist. Insert three-down brackets horizontally into the holes with screws and use a wrench to tighten them.
Mark another set of points on the concrete ceiling with the installation template. Drill holes into the center of the points with a power drill and insert the last three down brackets into the holes. Tighten the brackets with nuts and a wrench.
Installing the Connecting Posts
Attach the connecting posts to the ceiling brackets vertically with tightened bolts and nuts. Ensure that the posts are attached to the center of the brackets and are of equal distance to one another. You can use a measuring tape to guide you while attaching the connecting posts.
If the distance between the connecting posts is not equal, it will affect the overhead rack structure.
Attaching the Wire Grids
Using a wrench and bolts, you should link the wire grids together. After this, insert nuts into some connecting plates and use a wrench to attach them to the joint wire grids.
The grid’s corners are designed to fit into the connecting posts, so join the wire grids and posts with bolts. Joining them will help the structure to stay upright. Ensure that all nuts and bolts are properly tightened, and use a wrench to fix the loose parts.
Following these steps accordingly will produce a perfect overhead storage rack. You can attach accessory hooks to the rack to hold equipment that cannot stay on top.