Making anything at home not only saves your hard-earned money but also enhances your creative power. Besides, it is something that you can do to increase your confidence, as well. You can do many things at home if you have some skills to use a few hand tools or power tools.
Crafting a motorcycle helmet rack at home using necessary tools and other things is not rocket science. You don’t have to have vast knowledge and skills to make one on your own. All you need to have is the basic knowledge of using some hand tools. You may already have made a few DIY things at home. In the same way, you should make a motorcycle helmet rack if you have a top collection of your DIY things.
It is great fun to make a motorcycle helmet rack at home. It requires your time and effort. Plus, you should be creative as well. The more creative you are, the more eye-catchy your design would be. You might be thinking that it would be difficult for you to make one at home as a beginner. But believe me that the process of making a helmet rack is not so messy as you think.
In this article, I am going to share with you everything you need to know to make a helmet rack. You will learn the exact processes I followed to make a helmet rack for me. It has saved money and increased my creativity to make things at home.
Before going to delve into deeper, make sure you have arranged everything you need to go through the entire process of making a helmet rack. It will help you to speed up the making. Otherwise, you have to end up finding things you need to continue the process of crafting the rack.
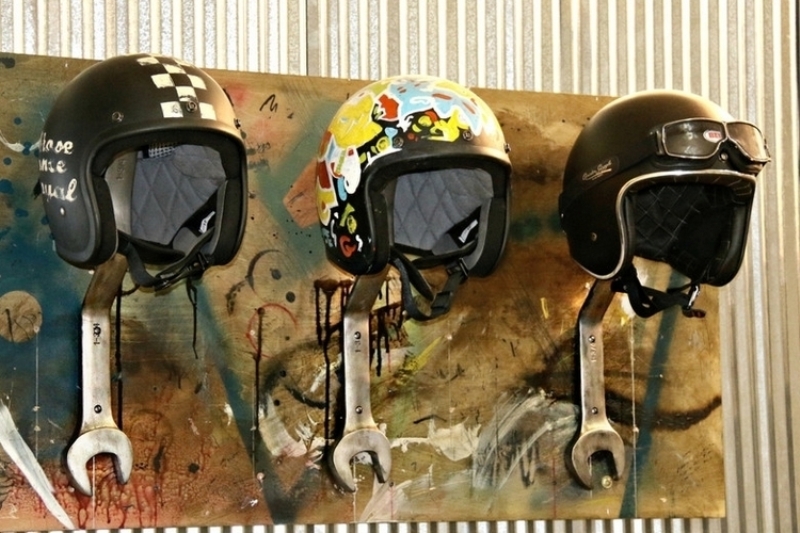
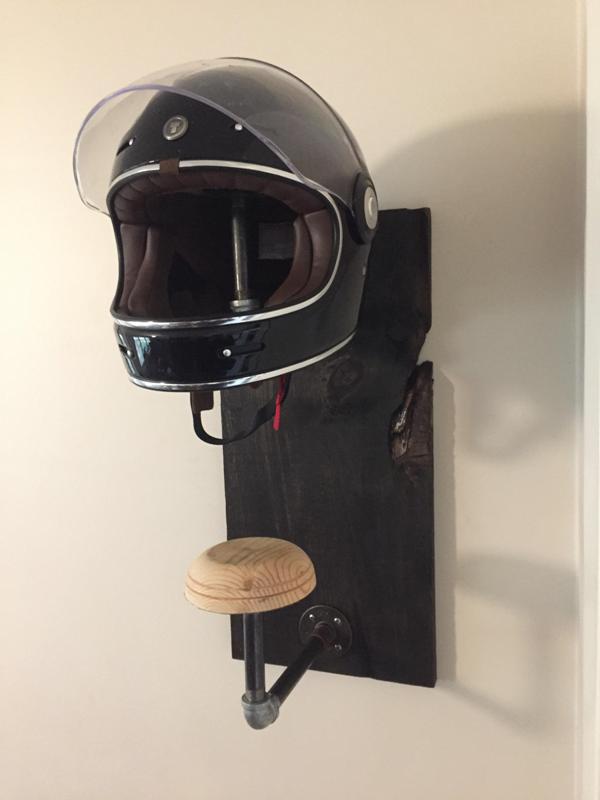
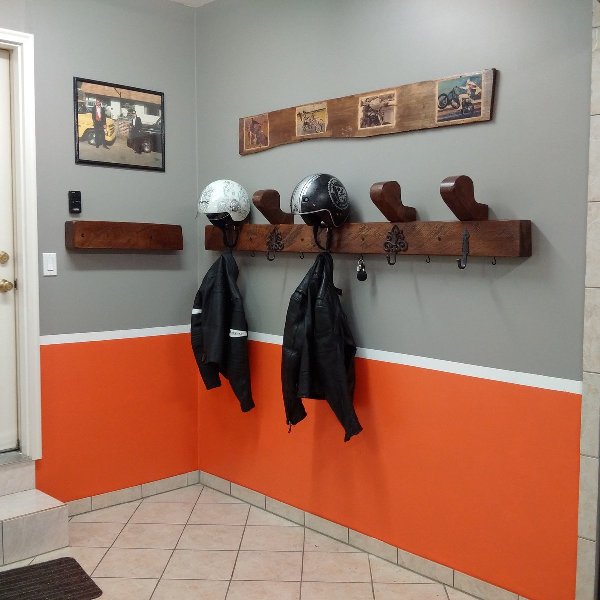
In this tutorial, I am going to show you how to make a wooden helmet rack instead of a steel one. You can make a steel helmet rack as well at home if you want.
What you will need
- Wooden Pellets (one piece is enough if you want to make one hanger)
- Screwdriver
- Screws
- a jigsaw
- a measuring tape
- Sandpapers
- Paint/color
If you are done arranging all the things as mentioned earlier, you are almost ready to start the process to make a helmet rack.
Step #01: Cut the wooden pellets accordingly
You need one big flat wooden pallet where the holder of the helmet will attach firmly. So, in this step, you should measure one with the measuring tape according to your needs.
Now it is time to cut wooden pellets for the hangers. They must be smaller and look like the English letter C. On top of the pellet, a round wooden pallet is recommended to attach. Besides, you can use a rectangular one. Both do the same work for your helmet.
While cutting any wooden pallet, don’t hesitate to use your jigsaw. A jigsaw can help you cut them accurately. Also, make sure you have attached the hangers in the middle of the big one for better balance. Take your measuring tape in your hand and measure it accurately.
Step #02: Sand every wooden pellet after cutting them
After cutting the pellet correctly using your jigsaw, use sandpaper for sanding them in such a way that they feel comfortable when you touch them. Don’t forget to sand every piece of the wooden pellet so that you don’t get hurt. Use thicker sandpaper for better and fast results.
Step #03: Time to attach the hangers with the flat one
In this step, you should use your power tool (drill) to drill all the hooks along with the big flat wooden part. If you plan to attach at least three hangers, measure the big flat wooden pellet which will mount against the wall. Make sure you attach the hooks at a certain distance. It will look both beautiful, and your helmets get sufficient space to hang on.
Two to three screws for each hanger are enough to make it sturdy. With the help of your power tool, screw all the screws with the pellets firmly so that they keep in position.
Step #04: Paint with your desired color
Before you go to attach the DIY helmet rack against your wall, you can make it more beautiful by painting it with your desired color. It is not mandatory because the color of the wood pellets are also lovely to look at. But you can paint it to increase its beauty with any color you like.
Apply thinner twice on the rack before painting with the final color. It will help your helmet rack look shinier while completing the color.
Step #05: Allow a few hours to dry it
Mainly if you paint the helmet rack, it becomes wet. So, it needs a few hours more to dry. You can use a dryer machine to dry it quickly. Alternatively, you can leave the helmet rack on a sunny space for a few hours.
When you see that the helmet rack is wholly dried and ready to install on the wall, use your drill machine to drill your wall. Insert royal plugs into every hole and then with your screwdriver tighten all screws so that the rack never falls from the catch. Now bring your helmet (s) and let them hang beautifully and safely on the hangers.
Final Verdict
If you have read the whole article from the beginning to the end, you are sure to make your motorcycle helmet rack at home. Don’t leave any step. I hope that you are now ready to make your own at home more creatively. If you want to add any step that makes it more meaningful, don’t forget to leave your valuable comment below.