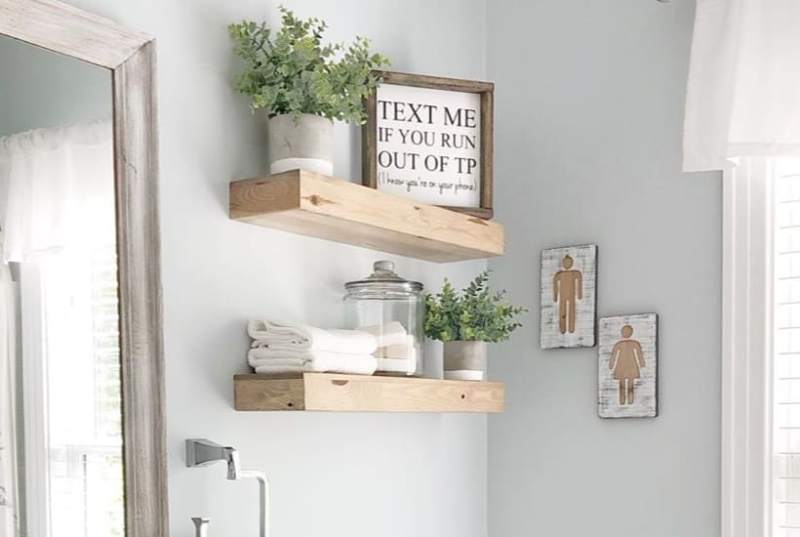
In case you don’t know, floating shelves are those little wall shelves that look as if they are magically floating in the air. That is the point, actually, which is why so many people don’t understand how they work. If done correctly, these shelves can be very strong. At the same time, most non-professional jobs of this sort will go wrong. That’s because there are a few subtle things to understand before you attempt to install floating shelves. In this article, we will attempt to educate you thoroughly on the right way to hang wooden floating shelves.
Why Most DIY Kits Are Worthless
There are all kinds of DIY wooden floating shelf kits on the market, but most of them just aren’t strong enough. They will last for a little while, making the customer think they got their money’s worth, but that’s just a trick. After a while, they will start to sag and wiggle until they eventually fall.
This happens because of a failure to use proper mounts. A proper bracket for a floating shelf looks like a small round-steel bar attached to a rectangle of flat steel. Of course, it will also have 1-4 screw holes for mounting. Most of the DIY kits out there will use strange designs which claim to be better but aren’t. The worst are the ones that make use of drywall anchors instead of actual brackets.
How To Mount Floating Shelves

One important point to remember is this: You always attach a bracket to a stud. You never attempt to attach it directly to the drywall. So, that means you will need to break out the stud finder. This is a tool that uses a laser to locate the bracing boards behind your drywall panels AKA “studs.” Drywall just isn’t strong enough, no matter what method you use.
Once you have marked the locations of your studs (which are always vertical, by the way), you know where your brackets will go and how many you will need. This is where you can run into trouble because wall studs are not always evenly spaced.
Technically, they are supposed to be evenly spaced, but it doesn’t always work out that way. This is why you should generally avoid large brackets with multiple pegs. There are just too many instances in which the studs and the screw holes will not line up correctly. It’s normally better to use small brackets and more of them.
The Crucial Step
This is where we talk about the number one mistake that most people make when it comes to the installation of floating shelves. Once they have found the stud, they will place the bracket directly over the stud and screw it right into place. That might sound correct, but it is not.
The problem is this: Drywall is very weak, as we said before. If you place the bracket over the drywall, that drywall will be in between the bracket and the stud. That’s not a problem at first, but it becomes a problem over time. What happens is that the weight of the shelf and brackets (as well as the weight of anything on them) will eventually compress that drywall, packing it down and creating a gap.
To be fair, this mistake is not likely to be a fatal flaw. It will create a little bit of wobbling in the shelves, but it probably won’t cause the shelf to collapse. Here’s the problem, though…probably isn’t good enough. If you’ve got breakable and/or heavy things on that shelf, you don’t want to risk them falling. You need to know that those shelves are secure, and that can only be done if you proceed correctly.
Putting The Brackets Directly On The Studs

In order to put the brackets directly against the studs, you will need to remove some of the drywall. Set your bracket in place at the spot where you want it mounted. Make sure the stud is directly behind the plate. Now, using a pencil, trace around the outside of that plate, keeping it firmly in place. Now you have an outline that shows you where to cut.
Take a drywall knife or a small rotary saw and cut that little rectangle out of the drywall. It is important to make sure that you don’t leave anything behind that will sit between the bracket and the stud. Don’t worry about that big ugly hole, by the way…the shelf itself will cover that.
Now, we should mention another common mistake that many people make, and that is a failure to line up the studs evenly. The last thing you want is a sloping shelf, so it’s very important to level them correctly. You can do this pretty easily by using a leveling tool. Just go by your best judgment on the first bracket, then draw your level line from there. Make sure you do not attach the rest of those brackets until you have checked and double-checked that they are level.
Conclusion: Finishing Up
At this point, there is very little left to do. You will need to drill holes so that your bracket pegs can be inserted into the shelf board. The trick here is to make sure the holes are exactly the same diameter as the pegs. That way, they will fit snugly and securely. If you have to use a rubber mallet to tap the shelf into place, you did it right.
Although there are certain subtleties that cannot be adequately explained, this isn’t all that difficult of a job. Once you know how it’s supposed to be done, it becomes quite easy. We hope that we have made your work a little bit easier by explaining these things to you. We also hope that you will come back again to visit us soon.