Thinking about diving into the world of solar energy? It’s a fantastic decision for your wallet and the planet. Solar panels reduce your electricity bills and contribute to a greener, more sustainable future. However, before you rush into harnessing the power of the sun, you need to understand the intricacies of solar panel installation and maintenance. This comprehensive guide will walk you through the process step by step.
What Are Solar Panels?
Solar panels are devices that convert sunlight into electricity. They are made up of multiple solar cells that work together to generate power. Solar systems are made up of solar panels (modules), a mounting system, and a solar inverter with a computerized controller. Solar panels generate direct current electricity from sunshine. The inverter then turns the generated electricity into alternating current (AC) so that it may be used in the home. The computerized controller manages the solar system and assures peak performance. A solar battery is essential if you want a battery backup system or an off-grid solar system.
How Much Are Solar Panels?
The cost of solar panels can vary widely depending on several factors, such as the type and quality of panels, installation costs, and your location. In general, you can expect to pay anywhere from a few thousand to several thousand dollars. Keep in mind that these costs are an investment in your home’s energy efficiency and sustainability.
Step 1: Assess Your Roof’s Suitability
Before you start installing solar panels, you need to determine if your roof is suitable for this purpose. Consider the following:
- Orientation: The ideal roof for solar panels should face south, southeast, or southwest to maximize sunlight exposure throughout the day.
- Shading: Ensure that your roof receives direct sunlight without significant shading from nearby trees or buildings.
Step 2: Get Multiple Solar Quotes
It’s crucial to compare solar installation options to find the best one for your needs. Obtain multiple solar quotes from reputable solar installers in your area, for example, reputable Impact Energy Solar installation in Denver. This will help you understand the costs, equipment, and warranties associated with each quote.
- Solar Quotes: When requesting quotes, ask for detailed information on the equipment they plan to use, installation timelines, and warranty terms.
Step 3: Choose the Right Solar Panels
Selecting the right solar panels is essential for the long-term performance of your solar system. Consider factors like efficiency, durability, and warranty.
Efficiency: Higher efficiency panels generate more electricity in limited space.
Durability: Look for panels with a solid frame and high wind and snow load ratings to ensure they can withstand various weather conditions.
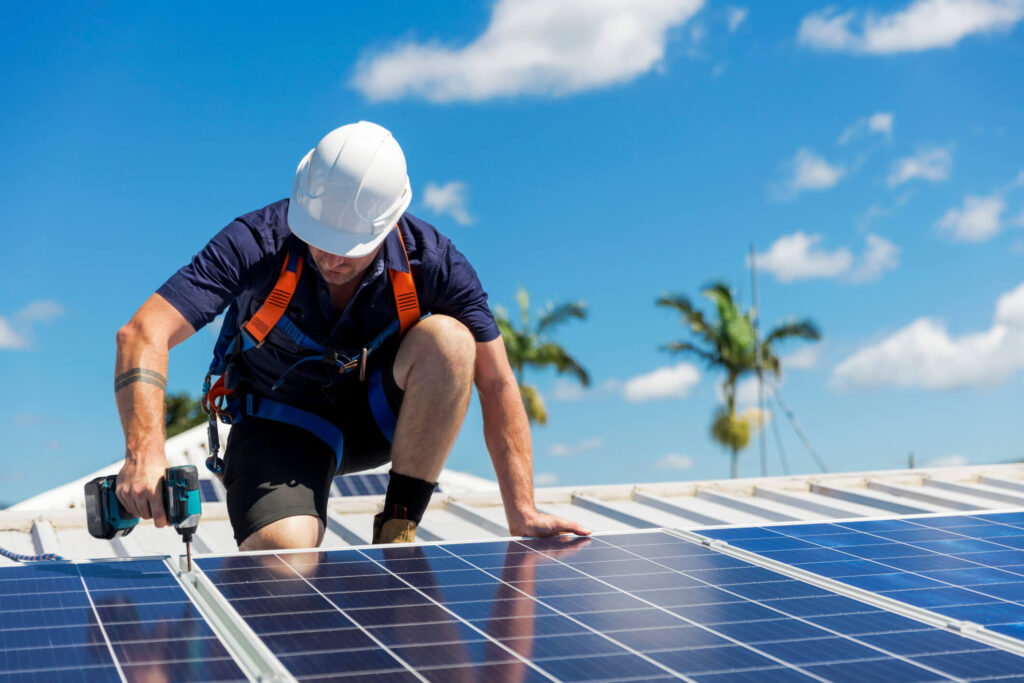
Step 4: Solar Panel Installation
Once you’ve selected your solar panels and found a reliable installer, it’s time to proceed with the installation. Here’s a brief overview of the process:
- Permitting: Your installer will take care of the necessary permits and approvals.
- Roof Preparation: The installer will prepare your roof for panel installation, ensuring its clean and in good condition.
- Mounting the Panels: Solar panels are securely mounted on your roof using racks or brackets. These mounts are available in 3 main types:
- Pole mounts;
- Roof-ground mounts; and
- Flush mounts.
- Installing the Solar Panels: The next step is to secure the solar panels to the mounting structure. This is accomplished by tightening nuts and bolts. The entire structure is securely fastened so that it is robust and long-lasting.
- Electrical wiring: MC4 universal connectors are utilized during wiring because they can be linked to any types of solar panels. These panels can be electrically linked in the following series:
- Series connection: In this scenario, the Positive (+) Wire of one PV module is connected to the negative (-) Wire of another module through a series connection. This wiring method improves the voltage match with the battery bank.
- Parallel Connection: In this scenario, the connections are Positive (+) to Positive (+) and negative (-) to negative (-). Each panel’s wiring voltage remains constant.
- Connecting to the solar inverter: The positive wire from the solar panel is linked to the inverter’s Positive terminal, while the negative wire is connected to the inverter’s negative terminal.
To generate power, the solar inverter is connected to the solar battery and the grid input.
- Connecting to the Grid: A standard plug is needed to connect to the main power switchboard to accomplish this connection. An output wire is connected to the electric board, which provides power to the dwelling.
Step 5: Solar Panel Maintenance
Proper maintenance is key to the longevity and efficiency of your solar system. Here’s how to maintain your panels:
- Regular Cleaning: Panels can get dirty from dust, dirt, and bird droppings. Clean them with a soft brush, water, and mild soap as needed.
- Annual Inspections: Have your solar system inspected annually by a professional to identify and fix any issues.
- Monitor Performance: Keep an eye on your system’s performance through monitoring software provided by your installer.
- Storm Preparedness: Ensure that your panels are secure and well-maintained before storms or extreme weather conditions.
What About Solar Rebates in NSW?
New South Wales offers solar rebates to encourage residents to switch to clean energy. These rebates can significantly reduce the cost of your solar installation, making it more affordable.

Wrapping It Up
Solar panels are a fantastic way to reduce your electricity bills, lower your carbon footprint, and contribute to a more sustainable future. With proper installation and maintenance, you can enjoy the benefits of clean energy for years to come.
Now that you have a deeper understanding of solar panel installation and maintenance, it’s time to take the first step toward harnessing the power of the sun. Start by getting multiple quotes, selecting the best panels for your needs, and working with a reputable installer to make your solar dreams a reality. Remember, every ray of sunshine is a step closer to a greener future.