Partition walls are used to divide larger rooms up into smaller spaces. Some homeowners use these walls to add extra bedrooms, while others rely on them to create an ensuite bathroom. No matter the reason for wanting a new partition, you need to know how to build and install one correctly.
Since the cost of installing stud walls can run upwards of £850, many homeowners prefer to tackle the project themselves. As long as you follow each step carefully, there’s no reason why you can’t make this a DIY project. However, if you’re not confident in your skills, it may be a better choice to turn to a skilled tradesperson.
Gather Your Supplies
Before you can begin any work, you need to head over the home improvement store to pick up the necessary materials. Make sure you have the right tools, including a saw, hammer, spirit level, and a filler knife. You’ll also need plenty of plasterboard, stud-work timber, nails, screws, jointing tape, and joining compound.
Create a Plan
You can’t build anything without a firm and very detailed plan. Use graphing paper to draw up a layout of the room. Make sure you measure everything accurately. You don’t want to cut your plasterboard too short due to rushed calculations. Know exactly where you want to place the wall. Take into account any windows or door openings.
Begin Building the Wall
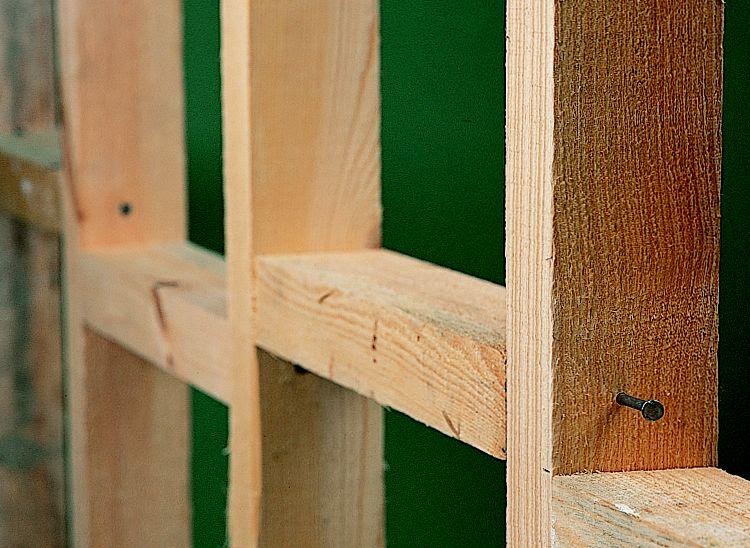
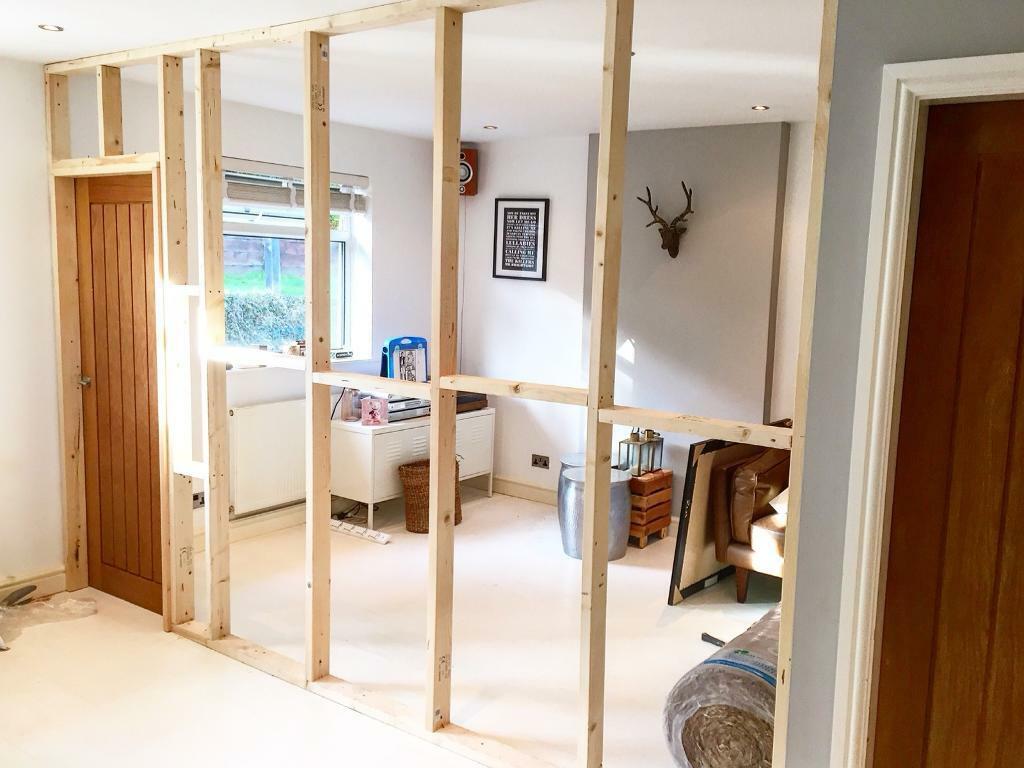
The first piece of wood to cut is the one that will fit the floor plate. Cut this to length and make sure it’s completely straight. This piece will be the backbone of your wall. Use screws to secure it into place. Follow this same step to cut and place the head plate on the ceiling.
Now it’s time to add the intermediate studs. Add at least 2mm to your measurements to ensure you get a firm fit. Otherwise, your wall may feel wobbly and unstable. Set the studs across the plates at a distance of 400-600mm, depending on the thickness of the plasterboard.
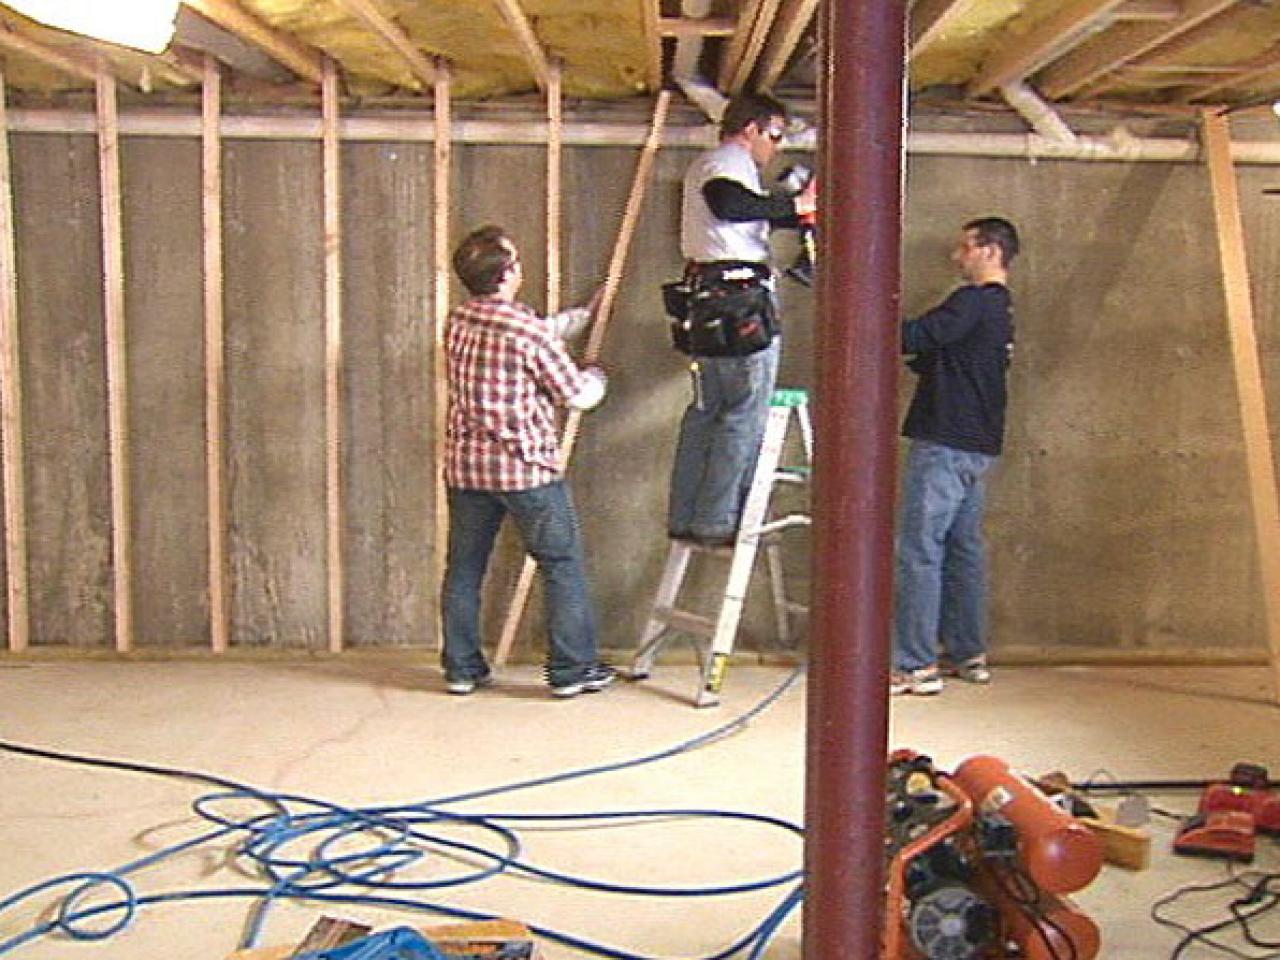
After you check for steadiness and make sure you don’t need to handle any pipework or wiring, it’s time to adhere the plasterboard to the timber. Apply the board horizontally and fit it at 300mm centres. After you finish one side, add any sound insulation before you close the opposite side.
Finish the project by covering the joints with tape. Follow with a joining compound to ensure your wall stays in place. While this job may seem overwhelming at first, after you install the first couple of studs, it should go by quickly. Many DIY enthusiasts can mount a stud partition all in a single weekend.
Helpful Tips
Even though this may seem like a simple job you can complete on your own, you need to make sure your stud partition wall meets the local regulations. After all, you don’t want to complete the project only to find out you have to tear it down and start over.
For even more reinforcement, consider using noggins to brace the joints. While this extra step does require a bit more time and effort, it will give you peace of mind in the long run.
Find out if you need to obtain any permissions before you begin. Be aware that every bedroom in the UK must have an outside window, so you cannot place a wall wherever you like. Working alongside a builder is an excellent way to ensure your new stud partition wall meets all the standards.