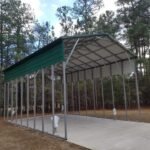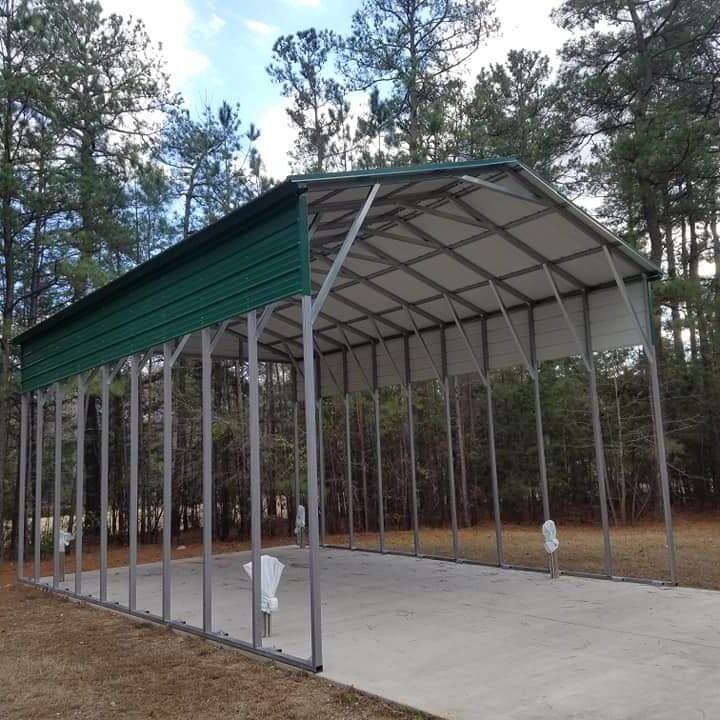
Buying an RV carport sounds simple until you measure your rig and realize how much room it actually needs. A carport that is a few inches too short can trap a roof vent or an antenna. One that is too narrow makes it hard to pull in, especially with slide-outs open or a tow vehicle hitched up. Too much space, on the other hand, can eat into a yard you need for everything else. Getting the size right takes a bit of measuring and a few honest questions about how you actually use the RV. This guide walks through the process step by step.
Start With Accurate Measurements of Your RV
The first step is to measure the vehicle itself, not rely on the number in a brochure. Brochure figures are often given for a base model, and options such as roof air conditioners, satellite domes, solar panels, and rooftop cargo carriers can add height that never shows up in the listing.
Here is what to measure:
- Overall length, from the front bumper or nose cap to the rear bumper or the farthest point of the back end
- Overall height, measured from the ground to the highest point on the roof, including air conditioners, vents, and antennas
- Overall width, measured at the widest point, usually the body itself, not the side mirrors
- Slide-out dimensions, if the RV has them, because the extended width and length can be significantly larger than the travel dimensions
If your RV has slide-outs, measure it both retracted and extended. Many owners park with slides in, but you will want to know if you can still open them comfortably once the RV is sheltered.
If you tow a vehicle or trailer behind your motorhome, or if you own a travel trailer, add the towed unit’s length to the total footprint you need. A tow dolly or a boat on a trailer can change the picture entirely.
Measure Height With Some Breathing Room
Height is the dimension people most often get wrong. A carport’s clearance height has to be greater than the tallest point of your RV, and you need to account for the structure’s own frame, roof panels, and any cross-members or bracing that hang lower than the main ridge.
A useful rule is to add at least a foot to your measured height. That extra space gives you room to drive in at an angle, deal with uneven ground, and avoid scraping the roof when you pull into a slightly sloped spot. If you plan to add a rooftop accessory later, such as a bigger air conditioner or a satellite system, add more.
Keep in mind that the ground under the carport may not be perfectly level. Gravel, pavers, or a concrete pad can shift over time, and frost heave can change clearances in colder regions. Plan for the ground you actually have.
Leave Enough Room to Drive In and Out
Length and width are where many carport purchases go wrong. It is easy to measure the RV and buy a structure that matches those numbers, then discover that getting the rig in is a stressful, multi-point maneuver.
Consider these clearance guidelines:
- Length: Add several feet beyond the RV’s length so you can open doors, reach the rear compartments, and stop the vehicle without bumping the end wall. Many owners find that two to four extra feet at each end feels comfortable, though this varies by driver.
- Width: Aim for enough side clearance to open driver and passenger doors fully, walk around the rig, and handle wind gusts without the body rubbing a support post. Extra width matters more if you have slide-outs, since those can extend several feet.
- Turning room: Think about the approach. If you need to back in or make a tight turn to enter the structure, you will need more space than the final parking footprint suggests.
It also helps to visualize the parking process. Sit in your driveway or yard, mark the carport footprint with stakes or painter’s tape, and walk through the motion of pulling in. This simple exercise often reveals issues that measurements alone do not.
Think About Accessories and Future Plans
The RV you own today may not be the one you own in five years. Many RV owners upgrade to a larger model, add a tow vehicle, or pick up a second unit. A carport sized only for your current rig can become a limitation later.
Consider whether you might want to store any of the following inside or alongside the RV:
- A second vehicle, such as a utility vehicle or a small car
- A boat, motorcycle, or trailer
- Camping gear, tools, or seasonal equipment
- Extra space for working on the RV during maintenance
If you expect to use the carport for more than the RV alone, a wider or longer structure may be worth the added cost. On the other hand, if the carport will only shelter a single rig, a precise fit can keep the price and footprint more reasonable.
Account for Your Property and Local Rules
Before you settle on a size, check the space you actually have available. Measure the area you plan to use, including any setbacks from property lines, utility easements, septic systems, and driveways. Some areas limit the total height or footprint of accessory structures, and these limits can affect the size you can build.
Homeowners associations sometimes have rules about covered parking, color, materials, and placement. Local zoning offices can explain setback requirements and whether a permit is needed. These details matter because a carport that fits your RV perfectly may still need to be adjusted to meet local requirements.
Also consider sight lines and access for emergency vehicles, snow removal, and drainage. Water running off a large roof needs somewhere to go, and a carport placed too close to a slope or a low spot can create wet ground underneath.
Consider Wind and Snow Loads for Your Chosen Size
Size and load are closely connected. A larger carport has more surface area for wind to push against and a bigger roof to collect snow. As a structure grows, the frame, anchors, and roofing material need to be rated for the conditions in your area.
Check the local wind speed and snow load requirements before you finalize your dimensions. Many manufacturers publish ratings for different sizes and gauges of steel, and the rating often drops as the span increases. If you live in a region with heavy snow or strong storms, a slightly smaller footprint with a heavier frame may be a better choice than a larger, lighter structure.
Common Sizing Mistakes to Avoid
A few errors come up again and again among RV owners:
- Measuring only the body and forgetting roof accessories or slide-outs
- Buying for the exact length with no room to open doors or walk around the unit
- Ignoring height growth from future upgrades
- Skipping the mock-up and discovering the clearance problem only after installation
- Assuming the size is universal without checking local permit or setback rules
Taking time to avoid these mistakes can save a lot of frustration and money.
A Simple Sizing Checklist
Before you buy, run through these questions:
- Have I measured my RV’s length, height, and width, including all roof accessories?
- Have I measured with slide-outs extended, if applicable?
- Does my planned height include at least a foot of clearance?
- Is there room to open doors, walk around the RV, and maneuver in and out?
- Will the structure accommodate any towed units or additional vehicles I plan to store?
- Have I checked local setbacks, permit requirements, and HOA rules?
- Is the structure rated for the wind and snow conditions in my area?
- Have I marked the footprint on the ground to visualize the fit?
Final Thoughts
Choosing the right size for an RV carport comes down to accurate measurements, realistic clearance, and some thought about the future. The goal is a structure that protects your RV, fits your property, and makes everyday use easier rather than harder. Take the time to measure carefully, leave room to maneuver, and check local requirements before you commit. A little planning at this stage usually means a carport that works well for many years.