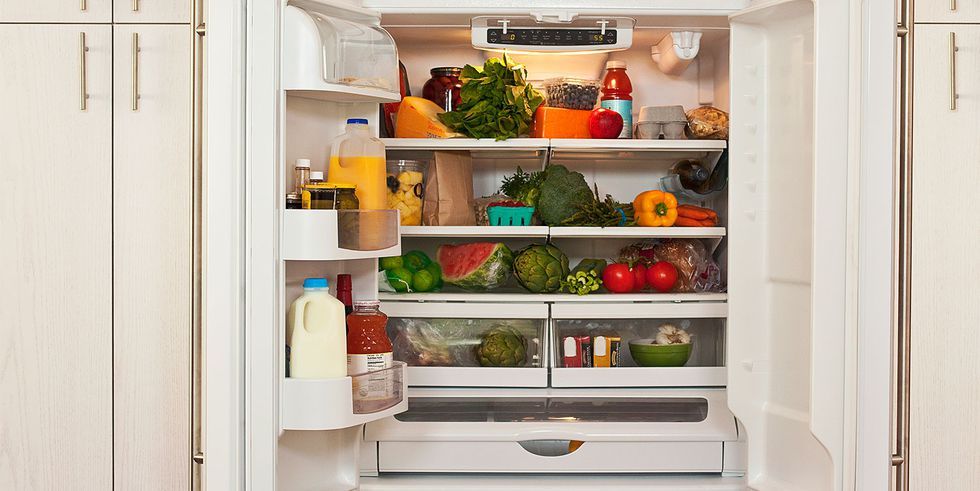
Just like a cluttered bedroom can prevent you from feeling completed relaxed, so is the case with your freezer. A cluttered freezer can make it hard for you to find items, and this can be a huge wastage of time when you’re in a hurry to cook a meal. Moreover, when your freezer is disorganized, it can lead to food items getting spoiled, and therefore, you waste food and your hard-earned money. To avoid all this fuss, it’s essential to organize your freezer. To organize your freezer well, you can use anything from airtight containers to reusable zipper bags.
Hence, we have mentioned five simple steps that can help you keep your freezer well-organized. Read this article to know!
Empty Your Freezer
As you have decided to live a clutter-free life, it’s better to make a fresh start. Therefore, you should start by emptying all the contents of your freezer.
In the process of emptying your freezer, you will be able to assess what you should keep and what should be tossed in the bin. If you think an item is expired or has freezer burns, you shouldn’t keep it in the freezer any longer.
In case, some food contents can be used within a few days, you should immediately use them to cook a meal before they get spoiled.

Categorize and Sort Your Food Items
You can easily find transparent bins or boxes online. You should leverage these bins or boxes rather than simply putting things in the freezer. Whatever freezer contents you’re left with, you should place them in these bins.
However, it’s important to categorize them in this step. For instance, one box should only be used for fruits and the other can be used for meat only. In case some of the items are packaged, you can also save storage space by removing their packaging and putting them in the boxes.
Sort Other Contents of the Freezer in Tupperware
Whether you want to store already-sliced veggies or salad without having them get spoiled in the freezer, you should toss the rest of the items in an airtight Tupperware to maintain their freshness.
The best thing about Tupperware is that you can even keep pre-cooked meals in them, and you won’t have to open every single box to see what’s in there.
Label Your Items
Once you have sorted all the content in boxes and Tupperware, it’s time to start labeling them. You can easily find stickers and smudge-resistant markers online that will allow you to label them with added convenience.
The best way to label your items is to write their sub-category. For instance, if you’re storing poultry, you shouldn’t simply label “poultry”, instead, you should write “chicken” or “fish”. Doing this will make it hassle-free for you to get your hands on the food items you want for your meal.
In this step, you can also add the date on which you have stored those items to ensure they don’t go to waste.
Keep Check of Your Inventory List
Now, it’s time to put all the categorized and labeled food contents in the freezer. Although you have written the dates on the storage boxes, it’s still best to keep a hard copy (or soft copy) of the inventory items along with their shelf-life.
Keeping a check on them regularly will allow you to plan your meals in a way that won’t let any grocery rot. It will also prevent you from over- or under-purchasing food items.