Building your own house is an ambitious project that requires thorough planning, coordination, and execution. It is an abode for you and your family for years, decades, or even generations to come. Thus, it is important to take the right steps and build a strong foundation for your house. This comprehensive guide will take you through the essential steps, from preparing the construction site to installing the final fixtures, ensuring your journey to creating your dream home is successful and satisfying.
1. Preparing the Construction Site and Pouring the Foundation
Site Preparation: Before any construction begins, the site needs to be properly prepared and permits are needed to be acquired by the builder. Once all the permits are acquired, the builder can start with the clearing. This includes clearing the land of any debris, trees, and rocks. The ground is then levelled, and access routes for construction vehicles are established. You can hire container trucks to take out all this debris from your site with the help of SA container service conveniently and efficiently.
Foundation Type: Depending on your location and house design, you’ll choose between a slab, crawlspace, or basement foundation. Each type has its advantages and should be chosen based on soil type, climate, and personal preference.
Pouring the Foundation: Once the site is prepared and the foundation type is chosen, excavation and footing installations are the next steps. Footings support the foundation and prevent settling. After the footings are in place, the foundation is poured. This step requires precise measurements and skilled labour to ensure structural integrity.
2. Completing Rough Framing

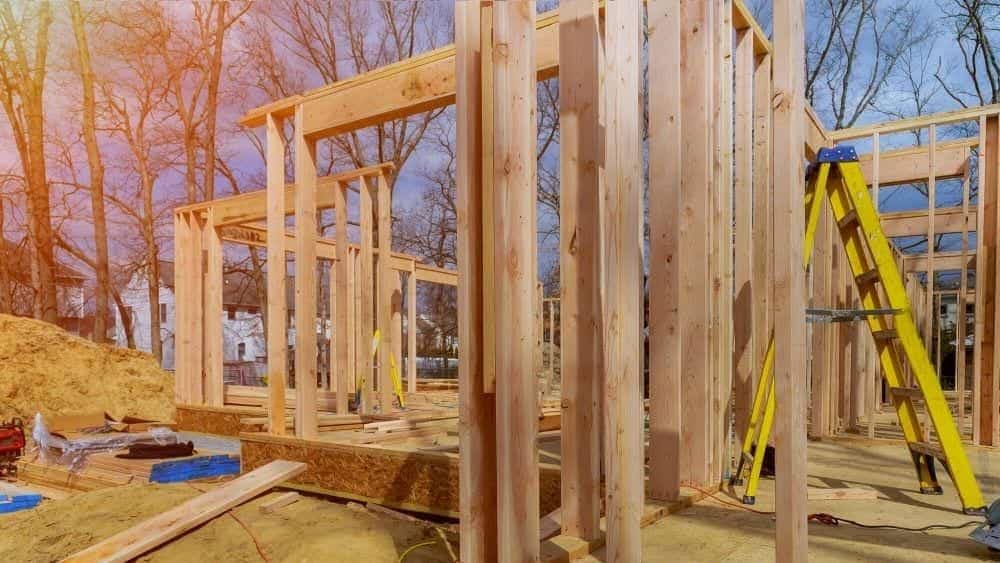
Wall Construction: The frame of your house, comprising floor, wall, and roof systems, is akin to its skeleton, providing structure and shape. Common materials for framing include timber, known for its versatility and warmth, and steel, valued for its strength and durability. The choice between these materials often hinges on factors like local climate, availability, cost, and personal preference. Accurate framing is crucial for ensuring the structural integrity and alignment of the entire house.
Sheathing: After the framing is complete, sheathing is applied to the exterior walls and roof. Sheathing, typically made from plywood or oriented strand board (OSB), acts as a sturdy base for weather-resistant barriers and contributes to the structural rigidity of the building. It also serves as a crucial layer in moisture management, protecting the frame from potential water damage and ensuring a tight building envelope.
Roofing: The roof, an essential aspect of the structure, is then framed and sheathed, setting the stage for the installation of roofing materials like shingles or tiles. This step is pivotal in ensuring the house is weatherproof and well-insulated. The choice of roofing materials often depends on factors like local weather conditions, aesthetic preferences, and budget, with each material offering different benefits in terms of longevity, insulation, and maintenance requirements. Proper installation of the roof is critical to prevent future leaks and structural damage.
3. Completing Rough Plumbing, Electrical, and HVAC
Plumbing: In this stage, the installation of pipes for water supply and waste removal is undertaken. The plumbing system’s design is crucial for ensuring efficient water delivery and waste disposal, and to prevent issues such as leaks or blockages in the future. This involves not only the placement of main pipes but also the integration of fixtures like sinks and toilets. The system must be meticulously pressure-tested to ensure there are no leaks and should comply with local building codes to ensure safety and efficiency.
Electrical and HVAC: The installation of electrical wiring, outlets, and fixture boxes is a critical phase. It involves laying out the electrical framework that will power the entire house, including lighting, appliances, and other electrical needs. Attention to detail is key to ensuring that the electrical system is safe, functional, and energy efficient. The HVAC system, responsible for maintaining comfortable indoor temperatures and air quality, is also installed at this stage. This includes ductwork, vents, and the central heating and cooling units. Both electrical and HVAC installations require adherence to strict safety standards and local building codes, and therefore, must be carried out by licensed professionals to ensure compliance and safety.
4. Installing Insulation
Types of Insulation: Common insulation materials include fiberglass, cellulose, foam, mineral wool, and concrete blocks. Fiberglass is widely used for its affordability and ease of installation, while cellulose, often made from recycled paper, is an eco-friendly option. Foam insulation offers high energy efficiency but can be more costly. Mineral wool is known for its fire resistance and soundproofing capabilities. Concrete blocks, often used in construction, provide good insulation and structural support but are less common in residential insulation.
Application: Insulation is strategically placed in walls, attics, and floors, areas most prone to heat loss or gain. The correct installation of insulation is crucial for maximizing energy efficiency, reducing heating and cooling costs, and maintaining a comfortable indoor environment throughout the year. The thickness and type of insulation used may vary based on climate and the specific energy needs of the house.
5. Completing Drywall and Interior Fixtures; Starting Exterior Finishes

Drywall: The drywall process includes hanging, taping, and finishing sheets of drywall to cover insulation, creating a continuous smooth surface for painting or wallpapering. This stage transforms the look of the interior, marking the transition from a construction site to a recognizable living space. Attention to detail in this phase is essential for achieving a polished, professional finish.
Exterior Finishes: Siding materials such as wood, vinyl, or brick are applied to the exterior walls, enhancing the home’s aesthetic appeal and providing an additional layer of protection against weather elements. The choice of siding material can significantly affect the home’s appearance and maintenance needs, with each material offering different textures, colors, and durability.
6. Finishing Interior Trim; Installing Exterior Walkways and Driveway
Interior Trim: This step involves installing doors, baseboards, windowsills, mouldings, and other decorative trim pieces. The trim work is not just functional but also an opportunity to add character and style to your home, complementing the overall design theme.
Exterior Walkways and Driveways: The construction of the driveway and walkways is an important aspect of landscaping and accessibility. Choosing materials like concrete, asphalt, pavers, or gravel can impact the look and functionality of these outdoor spaces. Proper installation ensures durability and complements the home’s exterior design.
7. Installing Hard Surface Flooring and Countertops

Flooring: Options include hardwood, which adds warmth and elegance; tiles, known for their durability and ease of maintenance; laminate, a cost-effective and versatile option; or carpet, which offers comfort and noise reduction. The choice depends on room usage, desired aesthetics, maintenance considerations, and budget.
Countertops: In kitchens and bathrooms, countertops are a focal point. Materials like granite and marble offer durability and luxury, while quartz provides a more uniform look and is less maintenance intensive. Laminate countertops are a budget-friendly option that comes in various styles and colours.
8. Completing Exterior Grading and Finishing Mechanical Trims
Grading: Proper grading around the house is essential for effective water drainage and preventing foundation problems. This involves sculpting the landscape so that water flows away from the house, which is crucial for long-term structural integrity.
Mechanical Trims: This includes finalizing the installation of the HVAC system, such as setting up registers for air distribution, thermostats for temperature control, and the heating/cooling units themselves. This stage ensures that the mechanical systems are fully operational and ready for use.
9. Installing Bathroom Fixtures

Fixtures: The final phase in bathroom construction involves installing sinks, toilets, showers, and baths. The selection of these fixtures can significantly influence the bathroom’s style and functionality. It’s important to choose fixtures that not only match your design preferences but are also durable and meet your functional needs.
Conclusion
Building your own house is a complex but rewarding experience and accomplishment. Each step requires careful planning and execution. It’s crucial to work with skilled professionals, adhere to local building codes, and not rush the process. With patience and attention to detail, you can create a home that is both beautiful and structurally sound. Remember, building a home is not just about constructing a building; it’s about creating a space where memories will be made for years to come.