Thinking about tearing down that old shed, ripping out a crumbling patio, or clearing a small building yourself? It saves money, and getting the job done is satisfying.
But demolition is not just about swinging a big hammer. It needs serious planning, strict safety rules, and the right machinery. If you want to do it smart, safe, and without breaking your back, you need to have a process.
Here is the deep guide to planning and executing your residential demolition project.
- Safety Always Comes First
Don’t lift a tool until you’ve followed these steps. Safety is the biggest thing here. No shortcuts. Before any physical work starts, you must know the lines are buried or running through the structure.
- Electric: You must find the main circuit breaker panel. For a detached structure, like a garage or shed, trace the power link back to the structure. You must physically turn off the breaker labeled for that structure. Use a voltage tester to be 100% sure the power is dead at the structure’s electrical system before you touch any wires. If you have doubt, call a licensed electrician to disconnect and cap the line. Never assume the power is off.
- Gas: This is critical. If your structure has a gas line (for a heater or grill), call your utility company. Do not try to cap or move a gas line yourself. A professional must handle the shutdown and capping. Gas leaks are deadly.
- Water: Locate the main shut-off valve for the structure’s water line. Drain the lines before cutting. This prevents flooding and prevents potential property damage.
Permits and Neighborhood Rules
Check with your local government or county office. For anything bigger than a small doghouse, you likely need a demolition permit. The city wants to know what you are tearing down and how you plan to manage the waste. Ignoring this can lead to big fines and delays. Also, look up any noise ordinances. Demolition is loud. You’ll be a better neighbor if you only run loud equipment during approved hours. Let neighbors know ahead of time when the loudest work will happen.
Your Personal Protective Gear
Your body needs protection from the dust and falling debris. You must wear:
- Hard Hat: Essential if you are working at any height or if walls are coming down.
- Steel-Toe Boots: Protect your feet from falling materials and stray nails.
- Heavy Work Gloves: Demolition wood is full of splinters and rusty nails. Wear thick, leather-palmed gloves. You’ll go through several pairs.
- Goggles: Wearing sealed safety goggles, the fine ones can protect the eye from fine dust.
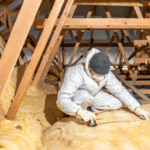
- Respirator (Not just a Mask): Concrete dust, plaster, and old wood dust are harmful to your lungs. Use an N95 or P100 respirator. A simple paper dust mask won’t cut it, especially when removing old drywall or masonry.
Checking for Old Hazards
If the structure was built before the late 1980s, you need to think asbestos and lead paint.
- Asbestos: This was used widely in roof shingles, floor tiles, siding, and pipe insulation. If you disturb it, the fibers become airborne and can be very dangerous.
- Lead Paint: Common before 1978. Sanding or disturbing lead paint creates toxic dust.
If you suspect either, stop working and hire a certified inspector to test the materials. Do not try to remove these materials yourself. This is where you hand the job to a professional.
- Make a Solid Game Plan
A smooth demolition is all about planning the collapse and managing the huge volume of garbage. This saves time and keeps costs down.
A. Debris Management
Demolition creates a massive amount of waste. Your primary goal is to get it off-site quickly.
- Estimate Volume: Visualize the structure you are removing. A typical two-car garage generates about 20 to 30 cubic yards of debris. You must rent a roll-off dumpster.
- Talk to the Dumpster Company: Ask about weight limits. Concrete and brick are extremely heavy. A dumpster full of wood weighs far less than one full of heavy masonry. You might need one big dumpster for wood and another, smaller container just for the heavy materials. Be honest about what you are throwing away to avoid massive overweight fees when they haul it away. Those charges can kill your budget.
- Separate Materials: Separating materials on-site such as putting wood in one area and concrete, metal, or asphalt in another. This makes loading organize and the dumpster easier, and you can often haul scrap metal to a local recycler for a small return. It’s often cheaper to dispose of clean wood and metal than mixed waste.
B. The Systematic Tear-Down
Don’t just smash things at random. Work smart and systematically, meaning while it’s true that you need to destroy, you also need to deconstruct.
- Start at the Top, Always: Work from the roof down to the walls, then the foundation. This prevents materials from crashing down on you and keeps the debris pile controlled. It makes sure walls don’t fall over unexpectedly.
- Deconstruction: Remove windows and doors first. These items often need separate disposal anyway. Then take off the roof covering (shingles, metal). Next, remove the roof structure (rafters). Finally, take down the walls.
- Avoid Overloading: Cut large wooden beams or metal pieces into lengths that fit easily and flatly inside your rented dumpster.
3. The Right Equipment for Efficiency
You can use a sledgehammer, but you will waste days and damage your back. Large residential projects benefit hugely from compact, heavy equipment. This is where a mini excavator becomes essential.
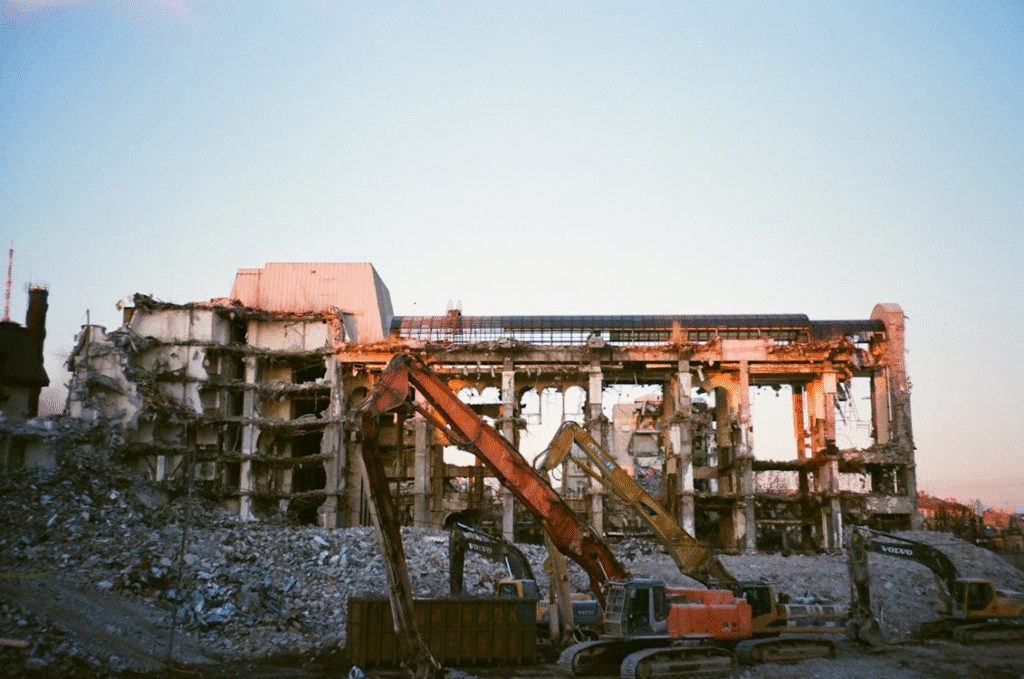
Mini excavators, sometimes called mini diggers, are small but mighty. The fit through standard yard gates and can operate in tight spaces where a full-sized machine can’t go. They have specialized attachments perfect for your demolition project:
- Hydraulic Breaker: It is mainly used for concrete and stone. The hydraulic breaker turns your mini excavator into a highly efficient jackhammer. It can tear out a patio, driveway, or basement hall, saving you hours of manual work.
- Hydraulic Thumb: This tool allows you to grab, lift, and load uneven, awkward materials such as twisted metal, large chunks of concrete, and long wooden beams—directly into the dumpster. Without a hydraulic thumb, you are trying to shovel everything with a bucket, which is slow and messy.
- Ripper Tooth: A single, sharp tooth attachment that is great for breaking up packed earth, digging out tree roots, or ripping up sections of pavement before you switch to a full bucket.
- Having useful machinery and the demolition-ready attachment can make your project much easier and faster.
4. What Happens After the Crash?
The structure is down. Now the hardest part begins, which is the final cleanup.
Foundation and Slab Removal.
Often, the biggest challenge is the remaining concrete foundation or slab. It’s usually much thicker than you think.
- Find the Edges: Dig around the perimeter of the slab or foundation wall to expose the vertical edges. Digging along the perimeter first makes it easier to lift.
- Break and Pry: Use the hydraulic hammer attachment to score lines across the slab every few feet. Then, use the bucket or ripper tooth to pry the broken sections up. You should use the excavator’s boom to put leverage under the slab for removal. Break it into dumpster-sized pieces.
- Fill the Void: Once the concrete is gone, you have a hole. You must fill this void correctly to prevent drainage issues or settling later. Use layers of compacted aggregate (gravel) or clean soil. If you are building something new, follow local codes for backfill and compaction.
Final Site Cleanup
The goal is to leave a clean slate, ready for whatever comes next.
- Final Sweep: After the big pieces are loaded, use the excavator’s bucket to scrape them gently and clean them of small debris, nails, wire, and broken glass.
- Soil Restoration: If the structure was old, the soil beneath it might be compacted or unhealthy. Bringing in new, screened topsoil is a good idea if you plan to garden in the area right away. Compacted soil needs to be broken up before planting.
Demolition is tough work, but it is totally achievable for a determined homeowner. Plan your project thoroughly, keep safety strict, and use the right equipment to handle the brutal, heavy lifting. This approach saves your body, your time, and ensures you have a clean slate for your next big build.