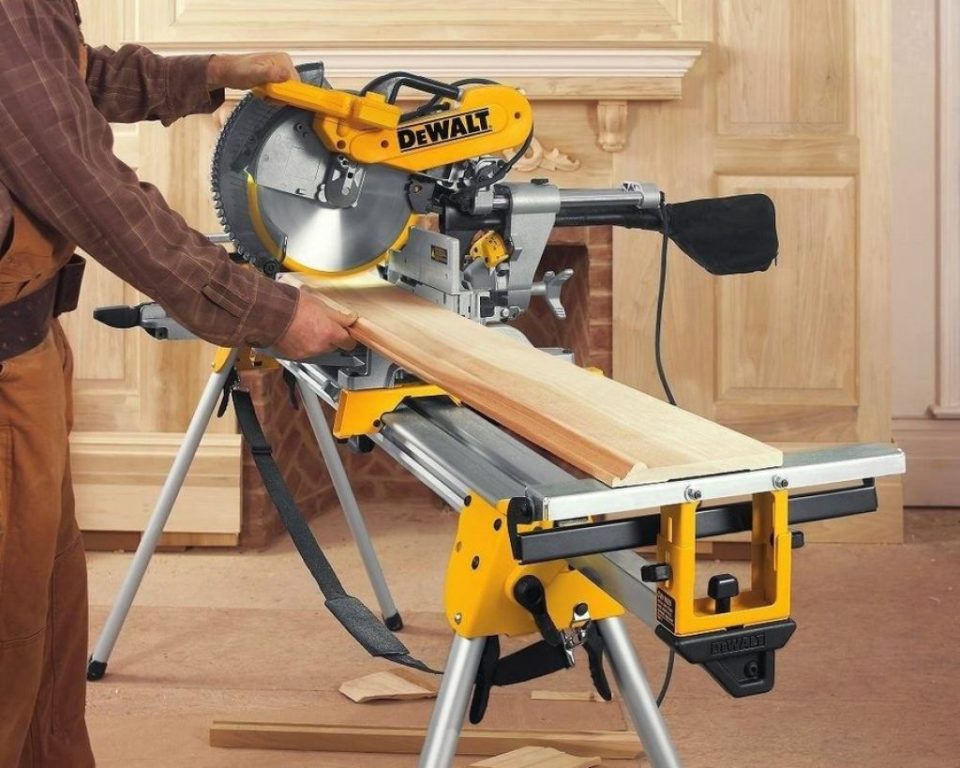
A miter saw is essential for a workshop or DIY project. A miter saw stand is mandated to work easily with a portable miter saw. Typically aligned towards the left to the right of a miter saw, the level of this stand is absolutely in line with that of a miter saw.
A miter saw is a small tool that can be carried quickly from one place to another. Taking along the miter saw stand is not feasible, so a portable one is required. Depending on the compound miter saw model, various portable miter saw stands are available. If you are considering buying one, check out the best budget miter saw.
As a DIY enthusiast, if you wish to make a portable miter saw stand, here we go.
Material required
- 2x6x12-foot treated wood: 1 piece
- 2x4x8-foot treated wood: 5 pieces
- 2x6x8-foot treated wood: 2 pieces
- Melamine-covered particleboard: a 2×3-foot piece with a thickness of 3/4-inch
- 1-5/8-inch deck screws
- 2-1/2-inch deck screws
- 3-foot-long, 1/2-inch-diameter bolts with a nut, lock washer, and two washers: 4 pieces
- Hand Saw
- Compass
- Chisel
- Pencil
- Combination square
How to make a portable miter saw stand?
- Start with making the support structure beneath the table.
- Cut four pieces of wood measuring 2×6 at 31 inches long, 0-1/4 inches for the ends, and two at 7-1/4 inches for center supports.
- Take 2-1/2-inch deck screws to attach one piece of butt to another.
- Take the opposite side of the piece of wood to connect with another side of the end piece.
- After connecting all four parts to form the corners, place the fifth piece in the middle
- Create another box structure with a similar way
- Position both the box structure parallel to each other
- Place a scrap piece acting a spacer of dimension 2X6
- Take one wooden melamine coated piece of dimension 24×36-inch piece of 3/4-inch-thick
- Attach the above over the box structures carefully using deck screw
- Now remove the spacer carefully
- As the saw table is complete, build leg assemblies to support the stand.
With a length of 40 inches 4 pieces of care are required with a dimension of 2X4 - To set the cutting surface 34 inches above the ground, you need to cut the length of legs at 32 inches.
- Align the top cuts of the two different sets of legs
- Clamp the pieces together by positioning a scrap of stock in between
- Take long deck screw to attach trapezoidal-shaped pieces of stock to the legs
- Attach the cross braces to the top and the bottom of the leg assemblies
- The stabilizing braces are attached at the distance of 10-12 inches from the bottom of the leg
- To provide considerable lateral support, a beam is required after the leg assembly
- Once the beam is ready, put up the stand together by sliding each leg to the assembly
- Fit the cross-braces of each leg assembly within each pair of beam notches.
- After connecting the legs to the beam, flip it onto the legs.
- Check the beam pushing it hard; it should not wobble
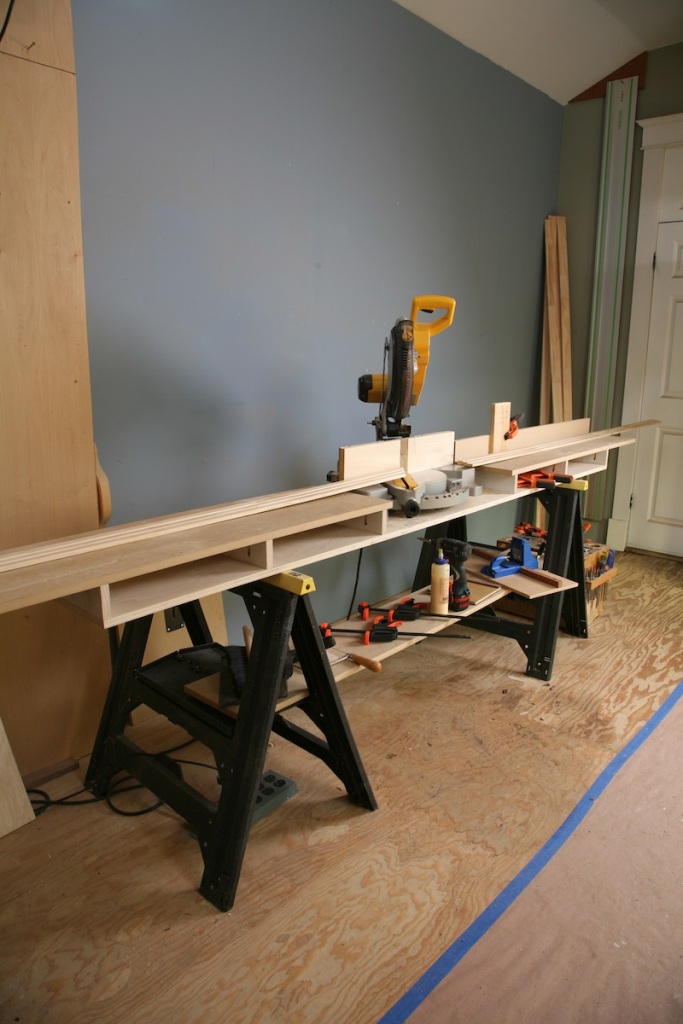
- Position the saw table on to the beam and fit the box structures under its tabletop
- Place the miter saw in the position where the fence is parallel to the beam’s far side to mark the bolt hole location.
- Drill the holes by removing the saw and align the mitre saw carefully after that
- Your portable miter saw table is ready.
How to Make a Portable Miter Saw Stand? was last modified: April 6th, 2024 by